Sunday, June 7, 2015

Aileron Actuation - Fuse Bottom Skins

Got another "to-do" checked off on the wing section today... yay! Finished the Aileron Actuation section today, which was a pretty cool section to work on. Previously, we had already created a few pushrods and bellcranks but not the torque tube assemblies, so it was time to get started on that:

Clocking/assembling the aileron torque tube assemblies - 5/16" offset and 17-3/4" total length (+1/32" acceptable)

One of the brackets needs to have a 5/16" clocking with respect to the other, as written in the plans. I decided to use a 5/16" drill bit (shown above) as my reference for clocking since it has a very precise "known" size. It went pretty smoothly and before I knew it I had two mirror-image torque tube assemblies. Now to prime and install on the wings. Installing them between the two torque tube bearings was actually was trickier than I thought it would be; there really isn't much room to work the pieces around, and the fact that the pieces have now been primed means they are even more reluctant to slip into one another. Eventually though, I prevailed and ended up with these torque tube assemblies installed:

R Aileron Torque Tube assembly

L Aileron Torque Tube assembly


With these installed, it was time to put the rest of the works together! This was exciting, because when complete you can push/pull on the levers here on the torque tube, and see the ailerons go up and down, way over on the other side of the wing... like magic! So, a few bolts/nuts/washers later, I had the following assembly together:

Torque tube -to- pushrod joint

Aileron bellcrank assembly with two pushrods

By golly it works! Awesome. Played with the ailerons, moving them back and forth for a longer period of time than someone my age ought to have. Oh well, no one was watching. We'll still need to final-rig these bearings at a later time for all the correct tolerances once everything is together, but they certainly appear close to the recommended clockings and everything moves smoothly and precisely! Very cool, couldn't be happier.

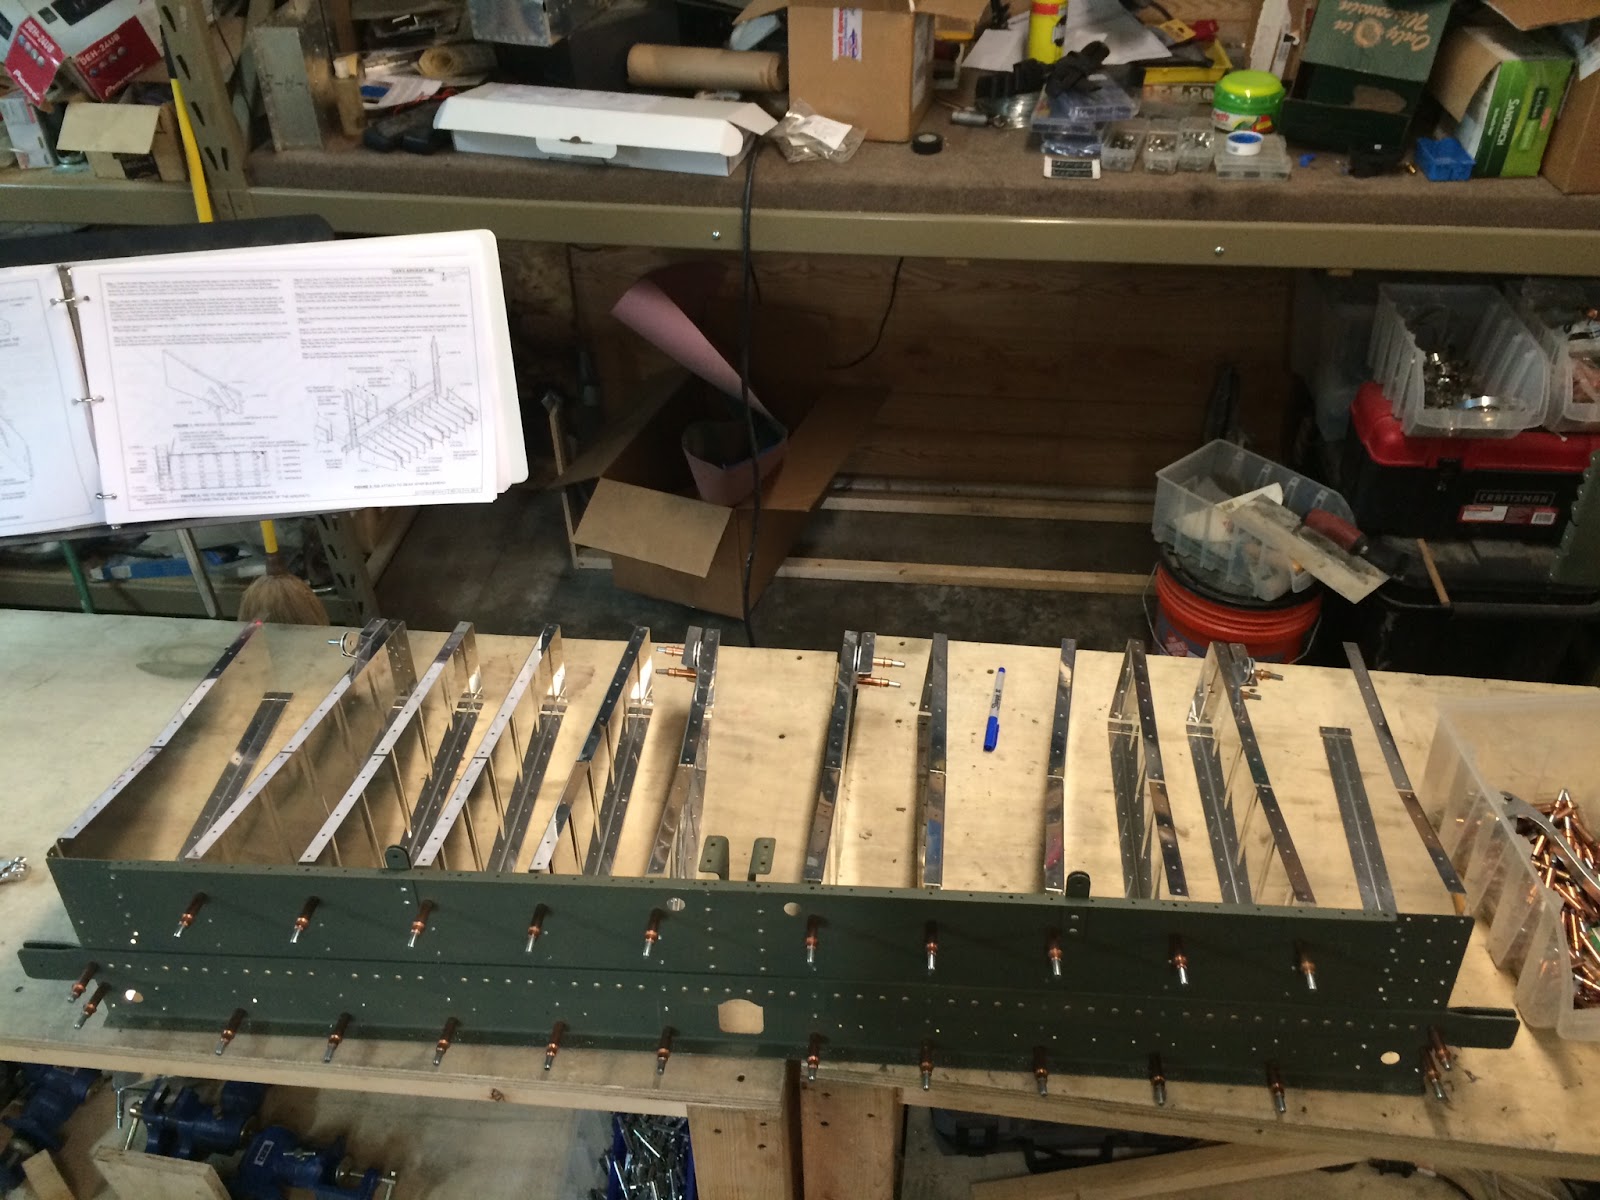
After Sarah got back from her afternoon plans (which included tearing up the skies over Marion in a C150, I might add), we got back to back-riveting the fuselage bottom skins. It's a fun process but gets pretty tedious after a few hundred rivets. We persevered through it all though, and I'm pleased to say that all back-rivetable rivets are now back-riveted! There's still a few dozen here and there that we skipped over to get later via the traditional flush-riveting method. Maybe tomorrow we'll get to that. No pics of the fuse in its current state yet, we're saving the "reveal" for when we get those last rivets done... hopefully tomorrow!


Saturday, June 6, 2015

Baggage floor ribs - Fuse Bottom Skins

A quick primer session later, we were ready to install and rivet the baggage floor ribs. Since there are only six of them (as opposed to 12 under the back seat) this effort went, well, twice as fast as the last riveting session, and we had a surprisingly big piece of the fuselage skeleton staring back at us:

Baggage floor ribs attached!


Side view of fuselage aft skeleton complete!

This was definitely pretty exciting. It's easy to see the area that the backseat passengers will sit in, buckle up into, where they will put their feet, and even where they will get hot air from the heater! Pretty neat stuff. Anyway, now that the skeleton is complete, it's time to start with the fuse bottom skins. These are two giant sheets of aluminum with a million holes that go over the bottom of everything we've just created. Time to  cleco it into place and get to match drilling!

For some reason, I didn't snap any photos of the skin match-drilling process, but suffice it to say that it is very much like the wing top/bottom skin endeavor, where you have a ton of holes and just need to do your best to keep track of which holes are "done" and which ones still need attention after shuffling clecoes around. Since we're well versed with this process, it really wasn't too bad but it did take many hours (and several drill battery swaps) to complete. By the end of it though, we had a drilled and deburred set of skins, and a skeleton to match. Now, just to scuff, dimple, and prime... why not move right along to it?!

The ol' Mikey J 2000 slaving away on the bottom skins

Unbelievably, we were actually able to get through the fuselage bottom skin prepwork in ONE day... wow! This included final-drilling, deburring, scuffing, dimpling, and priming a very large number of holes in the skins as well as the substructure. With all that progress made, we had to at least get started on the riveting process, just to say we did :)

Finally, a picture of the bottom skins and the whole assembly together... ready for riveting! Sarah says it looks like a tick... I think I see it.

So, we didn't do a bunch of riveting but we did enough to feel accomplished... we got through all the floor stiffeners and mid fuse seat ribs that could be back-riveted, which is almost all of them. Still plenty more to go though!

Hardly looks like any rivets have been done yet!

Tomorrow we'll continue with the riveting as time permits, Sarah has some stuff going on so in her absence I might go back to do some aileron actuation too, who knows?


Friday, June 5, 2015

Rear Seat Ribs - cont'd

A slow day at work today allowed for an extended lunch hour and some great progress on the fuselage for a weekday... awesome kickoff for a hopefully productive weekend! I was able to rivet the rear spar bulkhead to the center section/seat rib subassemblies, and then all 12 rear seat ribs to the rear spar bulkhead. The resulting assembly looked like this:

Holy cow... It's starting to look like a backseat!

R side view of the back seat ribs after riveting

L side view of the back seat ribs after riveting


Once those were done, I couldn't think of a single reason not to cleco the last bulkhead and baggage floor ribs onto this rapidly-budding fuselage!

Aft bulkhead and baggage floor ribs clecoed into place for match drilling

10 minutes of work yielded 33% increase in apparent size... wow!

Got some final-drilling done on these parts too, but then discovered an issue: one of the baggage floor ribs had a crack in its lightening hole flange. I assume that this comes from when the part is stamped out of raw material at the factory, and for whatever reason this piece split just a little bit. Here is a closeup of the affected area:

Spotted a crack in the aft-most hole of the F-1020-R baggage floor rib

I decided to call Van's builder support tonight (they have a morning window and then a 1-hr window from 5:30-6:30pm local time to call and talk directly with the 'mothership' builders) and report the issue and ask for guidance. I assumed that I could stop-drill this crack and be good to go, but wanted to make sure before doing anything. I got the good news I had hoped for; this apparently does happen from time to time during the manufacturing process, especially with the 2024-T3 aluminum material that this is made of, and it's no huge issue for concern. The builder I spoke with confirmed that sanding the area out (if it is small) or stop-drilling the crack (if it is larger) is the correct and perfectly acceptable repair for this kind of defect. So, a quick zap with a #40 bit and EZ-Burr yielded this repaired part:

Stop-drilled crack in flange

Other side of flange, it is apparent the crack was not square with the material but the stop-drill covered the area just fine.

It was a bit disconcerting to have a "defective" part (or at least "a part containing a defect") shipped as part of the kit... but after examining all the rest of the ribs and considering exactly the problem found and the solution implemented, we were put a bit more at ease. The only thing we really care about is that this crack does not propagate past the flange and into the rest of the rib. Thankfully, both the crack and the stop-drill are contained within the area of that flange, and therefore essentially no structural integrity is lost.

With that minor setback behind us, it's time for more priming and assembly.... tomorrow!


Thursday, June 4, 2015

Rear Seat Ribs

Flipped the page to the next portion of this section, the rear seat ribs! This part consists of twelve ribs that go aft of the rear spar bulkhead and are directly under the rear seat. Time to get the rear spar bulkhead out and start clecoing/match drilling!

The Rear Spar Bulkhead assembly with Rear Seat Ribs clecoed together

The process starts with separating/making four seat belt attach points that go on four of the 12 ribs, otherwise it's a really simple and straightforward process of drilling and deburring. After a quick visit with the deburring tool, a file, and the scotchbrite ball, it was ready for primer! A quick and easy priming session closed the night out, tomorrow we should be ready to assemble the ribs to the bulkhead!

Tuesday, June 2, 2015

Mid Fuse Ribs

No building yesterday due to a sick dog and some last-minute things that came up, but tonight we're happy to see Dag doing a lot better and got some more great progress on the fuselage. I hate to say this so early on in the fuse build, but this is definitely some of the most fun building we've had so far... most of the steps are pretty short bursts between prep work, priming, and riveting so it really feels like a lot is getting accomplished in a short period of time! Hardest thing about all of this is reading/following the plans properly... more on this later.

With the inboard seat rib subassemblies match-drilled and complete, we moved on to do basically the same kind of work for the outboard seat rib assemblies. One word of caution: the side of each piece that you are supposed to dimple is different between the outboard and inboard ribs, and without staring at the plans for quite some time this is an easy detail to miss. I *almost* dimpled the outboard ribs backwards but caught my mistake just in time. Anyway, with the inboard and outboard assemblies drilled, deburred and scuffed, it was time for a quick primer session:

F-1016 inboard/outboard seat rib subassemblies

Next, it was time to rivet these assemblies together, which overall went pretty well. I did end up having to drill out two rivets along the bottom of each of the outboard rib assemblies though, because the plans weren't very clear (in my opinion) about which side to place the manufactured head of the rivet. One diagram shows the rivet callouts, which is typically all you need, then only in a later diagram there's an arrow saying "shop head on other side"... thanks for that! Woulda been nice to know earlier. No major foul, everything drilled out perfectly and after redoing them you'd never know what happened. I'd say in general, the plans are most definitely starting to assume you not only "know what you're doing" but also know how to read their plans-- which, depending on what section you're working on often requires the elusive skill of divination. I'm still working on that one myself.

Anyway, after a bit of riveting we had all four assemblies... assembled.

The inboard (bottom) and outboard (top) seat rib subassemblies.

Other side of the subassemblies. Sorry for the bad photo.

With these ribs riveted together, it was time to put together the flap motor brackets, which only involves basically three more pieces and a vent tee. Although they were a bit tricky to align and drill, it was quick work to drill and deburr everything and get the two inboard halves mated, shown here:

The flap motor attach brackets and vent tee installed between the inboard seat rib assemblies

After that, it was time to attach the whole works together, to the Aft Center Section Bulkhead! This was an exciting step because it's the first time the parts are coming together to build the first "three dimensional" part that will essentially make up the floorpans for the rear seat passengers. After a few match-drills, deburrs, bolts, and rivets, we had this:

Completed seat rib/aft center section subassemblies

R side view of the fuselage so far

With that, it was time to call it a night... next up, the rear seat ribs! From the looks of it in the plans, there are 12 ribs that go under the back seat, so I see lots of fluting and deburring in our future (see, I'm getting better at that whole divination thing)!


Sunday, May 31, 2015

Mid Fuse Bulkheads - Fuel Tanks - Mid Fuse Ribs

Tons of progress yesterday, and today too! Picked up right where we left off last night and finished riveting the F-1004B Mid Fuse Bulkhead:

The completed F-1004B Bulkhead

F-1004B right side closeup - 30 rivet holes and 8 bolts on this piece, with a vertical line left open for now to accept ribs later on.

F-1004B left side, mirror of right

Two down, two to go! Next up was the F-1005 Bulkhead. This part was pretty straightforward to assemble, the only tricky thing being to take note of all the rivets to be left open for now to accept other parts later on.

F-1005 assembled, with a number of rivets left open per plans

View of left side of F-1005

Lastly, time to assemble the F-1034 Bulkhead. With only 24 rivets, it was done pretty quickly:

F-1034 Bulkhead complete!

Once the four bulkheads were assembled, it was time for "family" photo of the four of them stacked up:
All four bulkheads done!

This was exciting... we completed the first chapter of the fuselage without really breaking much of a sweat! TONS more to do, of course, but this was a great start...

With that, it was time to shift focus temporarily back to the wings, and re-test both tanks for leaks. Both tanks tested perfectly!

L tank holding steady 1 psi

While each tank was on the pressure test bench, I masked off the attachment flange and gave it a quick shot of primer to attach the VA-146 bearing and nutplate shims (from back in Section 18-5 Step 5). This completes the fuel tank section now too... woo! So, why not grab a few screws and bolts and attach them to the wings?

Fuel tanks attached - the wings look huge with everything bolted on!

Wings complete, minus wiring (80% done), bottom skins (40% done), and actuation (50% done)

Exciting! With that, we were able to get just a little jump start on the next chapter of the fuselage, Section 26 - Mid Fuse Ribs & Bottom Skins. This looks like a pretty big chapter, so I doubt it will be done in 3 days like the last one. Either way, here's the first few parts laid out:

The F-1016F-L/R inboard seat rib subassemblies coming together

These subassemblies go along the "tunnel" between the front and backseats, and have parts in them for front seatbelts and rear floor ventilation. Just a little final drilling and deburring, and it was time to call it a night. Awesome weekend of building, hope we can keep this up!!


Saturday, May 30, 2015

Mid Fuse Bulkheads

Continued with the F-1004B Center Section bulkhead this morning. Finished match-drilling, countersinking, and deburring. Man, these EZ-Burrs are great for parts like this. Anyway, one more shot of this part before coming apart for scuffing and priming:

The F-1004B mid-fuse bulkhead. The hat stiffeners shown here still need to be trimmed at the bottom to allow for bucking bar clearance... will do that in the final deburring stages.


On to the third bulkhead, the F-1005 Rear Spar Bulkhead. This is a pretty stout piece, but not nearly as much as the first two, which are partially constructed at the Van's factory due to larger-size rivets and precision tolerances. This is the first structural piece of the fuselage Van's trusts us to build completely :-)

F-1005 Rear Spar Bulkhead

More of the same here, just match-drilling and countersinking as the plans require. One note, the plans have you countersink a few of the #8 screw (#19 drill) holes along the inner sides of the L/R bulkheads, but the metal is so thin that the countersink can't center very well and ends up chattering quite a bit. I know this isn't a huge issue but I wish I knew of a better way to countersink these holes. Oh well.

With the third bulkhead prepped and pulled back apart, it was time to start on the fourth and final piece of this chapter: the F-1034 Fuselage Bulkhead assembly. I swear I thought I snapped a photo of this similar to the others, but I didn't find it on the camera. Oh well, it's the least exciting of the four assemblies, with a whopping total of 5 parts and only 24 holes to drill and deburr. <Yawn>

Once all these parts were complete, it was time to have a mass-deburring, filing, and inspection party. Sarah manned (or womanned) the belt sander while I manned the drill press with scotch-brite ball. In what seemed like no time at all, we had a pretty big handful of parts ready for primer:


All the mid fuse bulkhead parts ready for primer

The seat rail supports, also ready for priming

Once everything was primed, I had a free hour or two and decided to get a bit more organized with my hardware storage bins. We've been using these storage trays available from Harbor Freight, which I think are absolutely awesome. Each compartment comes out as its own bin, so you can grab just the bins you need for a particular task and then put them back where they came from when you're done. The trouble is, we only really fully organized our hardware with rivets and a few other select fasteners, but never really got around to sorting all the AN3 hardware, screws, washers, etc. Now that the fuselage kit is here with an intimidatingly huge box of hardware, it's time to "do it right" and spend the necessary few hours it will take to get everything sorted properly. So, we spent the rest of the afternoon sorting parts and labeling bins, unpacking the fuselage hardware bags in the process. This is the less exciting side of homebulding, but hey, it's gotta be done!

Anyway, after a quick break for dinner it was time to get back to assembly. The primer had dried and we were ready to begin assembling the bulkheads.

The F-1004A Bulkhead starting to come together

36 rivets and 8 bolts (only 2 for now) per side.. these things are pretty well attached for sure!


The completed F-1004A Bulkhead assembly

By this time it was getting late, but before calling it a night I decided to cleco the next assembly, the F-1004B together:

F-1004B assembly ready for rivets... goodnight!


Friday, May 29, 2015

Mid Fuse Bulkheads

We typically don't do much work in the factory on Fridays, but a low beer intake at the usual Friday after-work bar session combined with a high motivation level yielded a couple hours working on the plane tonight. We dug through the hardware bags and found the drill bushing we needed to match-drill the landing gear to the center section bulkheads. After drilling, the landing gear mount looked like this:

Landing gear mounts: These won't be fully installed for a while yet, but the match-drilling needed to happen now so that the rest of the assembly could be put together, and then these should easily just bolt into place later on.

With the mounts drilled, the prep work for the first of four bulkheads was done, and it was time to pull it all back apart and get started on the second.

The F-1004B Center Section Bulkhead with aft seat supports, hat stiffener, and L/R bulkheads attached.

Going pretty smoothly so far! Each bulkhead has a pretty high number of rivets that hold everything together, so it's definitely a workout on the drill going through every hole.

That's pretty much it for tonight... looking good! With any luck we'll be able to keep up the pace this weekend... stay tuned!


Thursday, May 28, 2015

Fuselage Begin

So the wings aren't 100% done, but they are "done enough" to begin work on the fuselage. Really, all that's left is re-testing the fuel tanks and finishing up a few smaller tasks like actuation and wiring. I figure we can get to these parts periodically through the fuse build just to switch things up a bit. The only big thing left to do is the bottom skins, but we're holding off on those for a bit longer, possibly until just before we move to the airport. We'll see!

We spent a few minutes in the shop cleaning up and organizing a bit more to get ready for the next deep-dive... starting on the fuselage! Time to open the new plansbook to page 1!

Fuselage Step 1: Section 25 Page 1 - Mid Fuse Bulkheads

This section consists of building four separate bulkheads: Two very beefy center section bulkheads to "sandwich" the wing spars on the front and aft sides (the main sections for these were actually shipped with the wing kit), and then two more progressively smaller bulkheads working towards the back. Thinking of it seating-wise, the two center bulkheads will go directly beneath the front seat passengers; the third goes underneath the front part of the backseat; and then the fourth goes at the rear of the backseat, which is also the front of the baggage compartment. It's all just a giant jigsaw puzzle really... with a few rivets holding all the bits together. And it flies. Hopefully.

First step was to create a pair of aluminum angle stiffeners out of 1/16" stock and mark a center line.

Attaching the F-1004P Mid Seat Rail Supports

Next step was to attach the F-1004C L/R bulkheads, which I did but didn't snap a photo of. After a bunch of pretty straightforward match-drilling, the plans then called to grab the landing gear support brackets and mate them up to the assembly. Before going any further, the plans need an "F-Drill Bushing" provided in the fuselage kit and buried somewhere in the hardware bags. We'll have to dig through them to find it, and that wasn't in the cards for tonight. Time to call it for now, but it was a good first day of building a new kit!


Wednesday, May 27, 2015

Flaps complete!

Crossing items off the "partially complete" list is going swimmingly... tonight we finished the flaps! It went just about as well as the ailerons did on Monday, just a bit longer of course and a few more rivets to contend with. It feels good to be done with trailing edges, they are always such a tedious pain in the you-know-what. Now that all four control surfaces are complete, it was time to bolt it all up to the wing, stand back and take a picture!

L flap, inboard side

L aileron, outboard side

R aileron on left, L aileron on right

I've got some aluminum C-channel that I'll be clamping on to each of the 4 edges for a day or two each, to help them become completely straight while the proseal cures fully. It's still in that perfect state where it's cured, but still cleans off easy enough with acetone, and can be influenced by things like this clamping device. Hopefully when all is said and done, we'll have four perfectly straight and well-aligned control surfaces!