Drilled 5/16" hole and beveled
Tapped 3/8-16!
With the bushings tapped and attached to the rod, it kinda looked like an industrial-grade marshmallow on a stick! Except not as delicious. Anyway, I also ended up re-drilling the holes through the steps so that the bolt slides in horizontally instead of vertically, so that they can be removed with the floors in place. I also upgraded to an AN4-20A bolt instead of the default AN3 size. After a quick drilling, deburring, and priming session, the steps made their way into their final spot and got bolted into place. Looking at the empty original hole on top of the mounting collar, I then realized I could take a small AN3-5A bolt and carefully drill/tap it into the bushing from the top side, giving an extra degree of shear strength too. This small bolt will still be removable from the bottom should the need ever arise.
L Step final-installed-- Silver powdercoat looks slick!
R Step from the inside
AN4-20A bolt horizontally through the whole tube with washer/nut on other side, and an AN3-5A bolt on top, tapped into the bushing and secured with blue threadlock. Where's this step going? Nowhere!
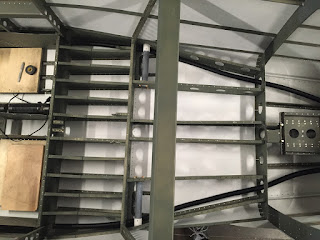
After that, I ran some 1" conduit through the baggage and rear seat areas, one on each side. The conduit fit quite nicely through the holes I had drilled, and I reinforced the tube at each passthrough with a few layers of Super33+ electrical tape, and secured with a zip tie. Should hold up very well!
Conduit runs through each side
Conduit runs through each side. Oh yeah, there's my modified battery tray too! :-)
Zip tie over Super33+ tape securing tube in place at each passthrough
That was pretty much it for today! I still need to prime the aft floor parts, will hopefully get to that tomorrow. Then all that's left to do is insulate under the seats and start putting it all together!


