The two Seat Floor Angles, 3/4" x 3/4" x 17-29/32" with a centerline drawn on one side
L/R Seat Floor Assemblies clecoed together for drilling
The process was straightforward and went very quickly. It was nice to be working on a new part, but also a bit difficult because the fuselage was sitting on two of my three workbenches that I typically use for these types of tasks. It will be nice once this section is complete and we can move the fuselage onto its own wheels (a yet-to-be-built castering wheel stand). We made it work though!
Once the Seat Floor Assemblies were prepped and shot with a quick coat of primer, it was time to move on to the second of two sub-chapters of this section: building the Mid-Seat Rail Supports. Again, this is a very simple, straightforward task that really can be completed at any time unrelated to any other part of the build thus far. Also, I might add that they are both great projects for new builders who may want to know what it's like to build an airplane and learn how to acquire some of the basic skills needed.
The Mid-Seat Rail Supports after drilling and countersinking
While the primer was drying on the supports, I could begin assembling and riveting the seat floor assemblies that had just dried enough to work on. A few dozen rivets and nutplates later, we had this set of completed assemblies:
L/R Seat Floor Assemblies, complete (top)
L/R Seat Floor Assemblies, complete (bottom)
By the time these were done, the primer had dried on the seat rail supports, so they could be riveted together as well:
L/R Mid Seat Rail Supports
That was a fun break from the current state of affairs with the main structure of the fuselage! Plus, it means we're almost done with section 28... the only thing left to do now is temporarily install the landing gear mounts (for the second and final time before they are installed for good) and match-drill them in a few locations. After making some measurements and markings, I installed them into position using the 5 bolts called out in the plans, and final-drilled 2x #12 holes in the forward brace.
Forward brace of the landing gear prior to match-drilling
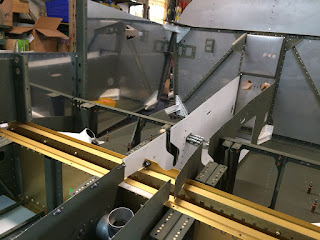
The next thing to do was fetch the Fwd Side Skins and install them temporarily to use as a drill guide for the side of the landing gear mounts. This was kind of cool, because we got a sneak peek as to what the fuse looks like with the side skins on:
Fwd Fuse Side skin temporarily installed, R side
Inside of forward fuselage, L side skin temporary installation
That's pretty much it for now! After this, the landing gear mounts came back off again for more deburring, and we're now basically finished with Section 28 except for riveting some parts of the bottom skin. We'll get to that early on this coming week I'm sure! With any luck, we'll be through all the side skins before we head to Airventure 2015 in less than two weeks.... we're both getting very excited for that!


