Saturday, December 5, 2015

Overhead Console

So we're going to build our own overhead console for the cabin cover, and this requires a significant amount of design, planning, and fiberglass work. I've spent hours online looking at the many excellent RV-10 build sites, getting ideas and inspirations on what we can do. While in the end this overhead is going to be our own design with a few unique things we haven't seen elsewhere, there will be a number of ideas and themes "stolen" from other builders. Basically, I'm envisioning the baseline of this console as being a kind of mix between those built by Justin Twilbeck (link here) and with a front switch panel similar to the one built by Ed Kranz (link here).

Some differences in the design I'd like to include are using automotive-style overhead vents, and some homemade DIY red/white eyeball light fixtures for each passenger. I'm also going to be separating the front and rear vents with ducting so that they can be independently controlled (much like the heat selectors). There will be a number of stages involving fiberglass work, and hopefully if everything goes well, we'll have one hell of an overhead console that will be just "perfect" for what we want. That's the hope, anyway. Time to nut up and become a fiberglass expert.

First thing to do was mount the visors. I wanted to see the areas that they would cover, and tailor the design of the overhead around them so it looks like it's all part of the same design. I chose the Blue Sky visors based on a few reviews, the fact that they are half the price of the Rosen units, and finally bit the bullet after reading Brian and Brandi's post here about them.

Mounting them was pretty straightforward, although I did run into one snag. The plans included with the visors say to install the mounting blocks 14.5" from the centerline, however, this isn't far enough away. The front channel hasn't yet "met up" with the door channel at that location, and so drilling through there would require a 1.5" - 2" long screw as opposed to the 3/4" screw included in the kit. I pondered whether to use the specified location and just get a longer screw, or go another inch and a half over and use the included screw. I went with the latter, and I think things will work great in this location. Again, at least for our setup, our mounting blocks are installed at approximately 16" (maybe 16-1/8") from centerline.

I'd like to "close out" these A-pillars as well, which means that these mounting blocks for the visors will be permanently installed. I'm also going to run some conduit up each side, and then cover it all up with fiberglass. So, I mixed up some flox and glued the mounting block and conduit into place:

Blue Sky visor mount and 3/4" conduit running down L side A-pillar (the mount is attached via a screw coming through from the door channel, but it is also now floxed into place)

R side A-pillar with visor mount and conduit

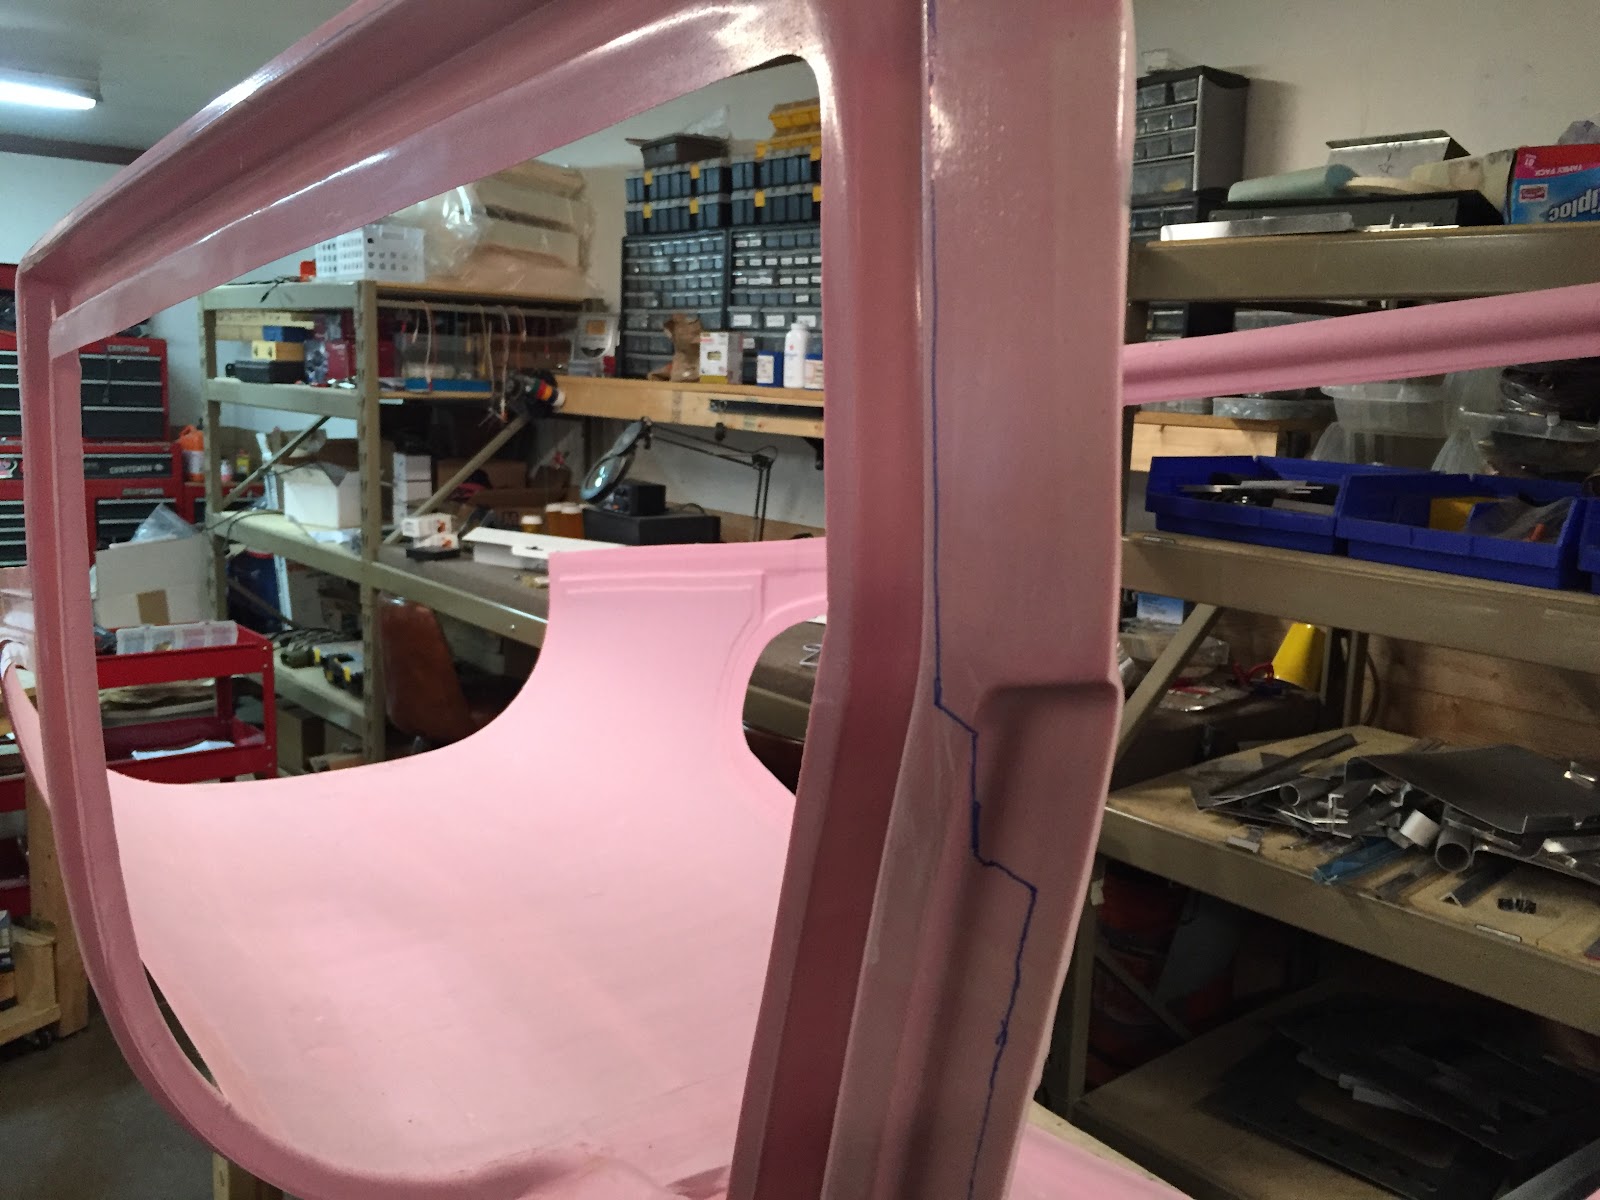
Next, it was time to start on the overhead itself. The first step will be to create the ducting for the front and rear vent systems. The idea here is to have two vent outlets coming from the tailcone. The left vent will provide air to both front passengers, and the right vent will provide air to both rear passengers. A pair of servos will control airflow independently for each system, and flow to some standard automotive-style air vents located in the overhead. Time to get started with fiberglass layups!

Foam cutouts wrapped in packing tape, forming the mold for the front air ducts

A similar duct will be created to take air from the right side of the airplane to the rear vent locations, and will "layer" on top of the vent you see here. That's "phase two" though... for now, we have to lay up some glass here!

First fiberglass layup of the build! Not too bad, all things considered...

It's pretty ugly up close, and I learned a few things about cutting and placing the layups that hopefully will make the next layup go better. But... I think it will work!

Now to let it cure while keeping our fingers crossed! Hey, worst case, we rip it apart and try again. I guess that is the one nice thing about fiberglass...


Friday, December 4, 2015

More Cabin Cover - Avionics Order

Today we finished all (or at least most) of the prep work on the cabin cover according to the plans! Unfortunately, there is a LOT more prep work to do on this piece that is not mentioned in the plans. We need to build an overhead console, figure out the lighting and ventilation systems, and finish off the fiberglass in all the areas that will be exposed. This will be some fun work, but it will likely take several months before it's all complete. We'll just have to make sure we keep at it!

Anyway, the first thing we did was match-drill the aluminum strip set aside from back in section 10 (tailcone). I had to think for a second where I put the darn thing, and eventually found it.

The aluminum strip set aside in 10-12 Step 1. I wrote "SAVE!!" on it in a number of places.

Match-drilling this, along with the two side strips was fairly straightforward, maybe just a bit boring and tedious, but we got through it pretty quickly. Next, we had to countersink all the holes in the cabin cover that we had made. I whipped up a small 0.032" spacer as recommended in the plans to hold the microstop square with the flange on the cover.

Countersinking the cabin cover, using a 0.032"spacer

I dimpled the other side of the spacer with a #30 dimple to trial-fit the countersinks

Otherwise, that's basically it! The next part of the plans basically has you final-install the cover to the fuselage. We're not quite ready for that yet, now we still have to design and fabricate an overhead console and all kinds of other stuff. Hopefully we'll get started on some of that this weekend.

In other news, we placed our order for avionics today.... OUCH. Biggest single purchase I've ever made, short of buying a house. I've been talking with Jed at Stein Air for a couple weeks now, narrowing down my options and figuring out what exactly we're going to do. Here's the short list of components we got:
  • Garmin G3X Touch 10" Dual Display w/ EIS & XM
  • Garmin GNS 750 Touchscreen NAV/COM navigator
  • Garmin 3-axis autopilot with GSA-28 servos and GMC-307 control panel
  • Garmin GTR 20 COM radio (for COM2)
  • Garmin GAD 29 ARINC interface
  • Garmin GAD 27 integrated controller (brand new product just announced last month)
  • Garmin GMA 350c audio panel w/ Bluetooth
  • Garmin GTX 23ES transponder with ADSB-out, paired with GDL39R ADSB-in
  • Grand Rapids Mini-X backup EFIS system
  • All the connectors, wiring, sensors, antennas, and more needed to get all this wired together
By the time I added everything up, I wanted to cry. Hopefully, I won't regret this purchase decision, or Garmin won't announce their new line of avionics in January or something that are twice as good and cost half as much. This really was the time to buy though, for a few reasons: (1) Garmin has their "stack up the savings" holiday rebate program going on right now through the 15th, that will give me $1000 back in rebates; (2) my credit card is giving me a 2% cash back deal through the holiday season, which for this kind of purchase is a good chunk of change; and (3) Stein Air gave me a heck of a package discount price... I couldn't come within $500 anywhere else.

As nervous as I am about the purchase, I'm pretty confident that this is the right system for me though, after lots of careful consideration and research. Excited to get started wiring all this stuff up! Quick plug for Stein Air, they have been awesome to work with so far and I'm very happy with the experience up to this point. With a reputation like theirs, I'm quite sure the rest of the experience will go just as well!


Thursday, December 3, 2015

More Cabin Cover

So today we continued with the cabin cover, this time drilling the four holes in the top of the cover to hold the WD-1043 Center Cabin Brace. This series of steps presented a few unique challenges, the first of which was to figure out how in the world do you precisely determine the centerline of the cabin top? The fiberglass is very rough and uneven, and there is no obvious way to determine where the middle is. We finally figured out that the middle can be found on the exterior side of the top, and you can then extend that center line forward and around to the inside.

Once you've marked the center line, you have to match-drill the brace into the fiberglass all the way through to the exterior. The plans are kind of scary here, warning you to ensure you drill perpendicular to the parts. Since the cabin cover is so thick in this area, even a small variation can make the four holes look like they were marked off on the exterior by a drunk person. No one wants that! I ended up doing pretty good I think... not perfect, but pretty good.

Once the four holes were drilled, we removed the cover from the fuselage and began cleaning out all the dust and chips. I fabricated four small tubes as called out in the plans to insert into these four holes we just made in the top. The idea is that these tubes reinforce the attachment point and allow the screws to grip a little better. They also look pretty cool after countersinking them into place:

The four F-10106 spacers before countersinking - don't spend an hour like I did making four spacers EXACTLY to the correct length per the plans... you're just going to whittle them down anyway when countersinking. Just make the interior end nice and leave the exterior end rough.

After countersinking-- looks pretty neat!

Word of advice to future builders: be careful when countersinking these! While running the drill with the countersink, it can grab the spacer and begin spinning the whole thing inside the cabin cover. If your finger is on the other side holding the spacer flush, the spacer basically acts like a mini hole saw and you'll end up with a small, perfectly circular piece of skin that used to be part of your fingertip. Ask me how I know :-)

Next on the agenda is match-drilling the backing strips, but we'll save that for another day... stay tuned!


Wednesday, December 2, 2015

Cabin Cover

Well it's been an interesting week so far! Been putting together our avionics order, and started fabricating a mount for the circuit breaker panel to go on the lower left side of the forward fuselage, under the air vent. We've also gotten a few short sessions of sanding the cabin top in here and there, but it kinda dragged on over a number of days with no real feeling of forward progress. Finally though, the cabin top was sanded enough to fit properly in place, and allow the aft top skin to be clecoed in place over it. This is easily one of the top 10 most exciting moments so far in the build, because all of a sudden it strikes you-- hey, you've got a roof!

The next thing to do is match-drill a number of holes along the mating parts and begin to cleco the cabin top to the rest of the structure.

Drilling the forward-most row of holes in the aft top skin into the aft flange of the cabin top

Drilling the row of holes along the top of the mid fuse side skins

Clamping the door frames into place to get everything aligned properly for drilling

That's pretty much it for today... lots of sanding and drilling. Stay tuned for more sanding and drilling!

Sunday, November 29, 2015

Long Weekend

Unfortunately this weekend marked a rather sad moment in our lives. We had to say goodbye to one of our two beloved four-legged friends, Dag, a.k.a. "Daggles" "Dagelope" "House Horse" "Bignose" and a number of other nicknames. Over the last few months he was battling a fight with cancer, and on Friday it was time to put an end to his suffering. He will be greatly missed by all who knew him, and has left a void in our household that won't soon be filled.

Although we did get a few odds and ends done on the plane this weekend also, nothing really worthy of mention at the time being has happened, and I'll fill in a few of the blanks as we continue. For now, I'll end this post with a pic Sarah put together for the one and only Mr. Daggles. He didn't always wear a costume, but when he did, he owned it. We'll miss ya buddy.

R.I.P. "Dag" 2007 - 2015

Thursday, November 26, 2015

Cabin Cover

Happy Thanksgiving! In between sleeping in this morning and getting ready to go do the family thing this afternoon by making my spinach and artichoke dip, we found some time to wander into the garage and continue on the cabin cover.

Lots of sanding and mess-making! Wow the sides along the door sills need to be trimmed down to almost nothing. Like many builders before us, we are unimpressed with fiberglass work. It's dirty, it smells funny, and you have to wear breathing masks and eye protection and all that stuff. In the end though, we were able to sand away enough material to get the cabin cover to slide all the way down and into place... ok, it was worth it!

Cabin Cover fits in place for the first time!

Still LOTS more sanding and fine-tuning to do, but this is pretty close at least for the initial fit. Definitely worth stepping back and admiring our work!

Ok, now on to more important things for the day... gotta go make that dip and go eat some turkey. More building to come this weekend!

Sunday, November 22, 2015

Empennage Attach

So while we wait for the next good time to continue with the cabin cover, I thought I'd try something new and continue with some other unfinished business, such as attaching the empennage to the tailcone. Technically speaking, this task is part of the Empennage kit plans as Section 11, and could have been performed LONG ago before we even started on the wings or fuselage. However, many builders don't do this until even later in the build than we are, and wait to attach everything for the first time until the plane is in its hangar and ready for final assembly. I think it will be advantageous to attach the tailfeathers now and get an idea of what we're up against before moving to the hangar.

Fetching the empennage plans and turning to Section 11, I got started. Basically, you need to secure the horizontal stabilizer to the work table and attach each elevator, one at a time, to do some alignment, clearance checking and drilling. Then, you attach both elevators and match-drill through the control horns so that both elevators are perfectly aligned. I didn't take too many pictures of the entire process, but here's at least a few:

L Elevator installed for drilling

L Elevator attached and moving for the first time

Duct tape holding the elevator in 'trail' position for match-drilling the control horns

The process went pretty well altogether, and before long we had two elevators and a horizontal stabilizer ready to install to the fuselage. Next, it was time to start the attachment process. First, the horizontal stab gets clecoed into place, and then some more match-drilling and alignment is performed.

Horizontal stabilizer clecoed (and now bolted) into place on the aft deck

Starting to look pretty cool back there!

The trickiest part of this process was aligning the horizontal stabilizer to be straight and true. The plans have you take a long piece of string and attach it to a center rivet hole further forward on the tailcone, and ensure that you have the same distance between there and each aft corner of the stab. The initial measurement was off by just a gnat's eyebrow, so a little tweak with the clamps holding everything in position made the second measurement fall perfectly in line. Match-drilling things together permanently placed it into alignment!

Next, things started to come together pretty quickly. I fetched the rest of the empennage parts and was able to perform all the steps of attaching the vertical stabilizer, elevators, and rudder in fairly short order!

N165MJ with tailfeathers attached for the first time!

We're going to need a higher ceiling...

Wow! Although these parts have been built for a long time, it's pretty impressive to see them all come together on the plane and actually make it actually look like a functional thing! So, we played arouind with the elevators and rudder for a bit, and called it a night. Awesome day of pretty rewarding work!

Next time, I think we'll probably be back to fiberglass work... womp womp.


Thursday, November 19, 2015

Cabin Cover - First Cut

We accomplished the first cut of the cabin cover tonight... woohoo! It went mostly "okay"... definitely a big gear shift from all the aluminum metal work that we've grown accustomed to. Sarah will be involved quite a bit more these days too, since she has earned the esteemed title of "fiberglassing expert" on this team (you may remember from one of our first-ever posts about the EAA SportAir Workshop we attended, I took the sheet metal course and Sarah took the fiberglass course). In truth, we both have a lot to learn about fiberglass work, and we'll be taking it slowly and carefully, and hopefully not end up splitting the cover in half or something and end up needing to order a new one. I'm fairly certain this thing isn't cheap.

So with that, it was time to get started! We donned our dust masks and safety glasses, got the shop vac ("R2") handy, and grabbed our secret weapon: a Dremel MultiMax oscillating saw. Sarah mentioned that they used one of these in her fiberglassing class to cut cured pieces, and it cut through them like butter and made very little dust. Excited to see how it works!

Team Mike & Sarah ready to cut some 'glass!

Moments after this photo was taken, we discovered that the oscillating saw works TERRIBLY on the cabin cover. It bounces all over the place and barely made any kind of cut at all. On the bright side I guess it didn't make much dust either, so it did live up to that end of the bargain. So, we went back to the normal plan and grabbed the air cut-off tool. After installing a fresh cutting disk, we got started. In a demonsration of her multi-tasking abilities, Sarah took this video of the first cut while holding the vacuum nozzle:

First cut of the cabin cover!

It's a relatively slow process, and even though we have a decent-sized air compressor, I've long known that it isn't quite big enough to run the air-hungry cutoff tool continuously. It will go for a minute or two but then runs out of steam and needs a few minutes to recharge. No big deal, just something to be aware of. After a handful of cut/recharge cycles, we had made all the necessary cuts to attempt an initial fit of the cover!

Initial fit of the cabin cover - doesn't quite slide into place yet!

Nowhere near enough yet! That's ok... hey, at least we didn't cut off too much. Now it's going to be many cycles of cutting and sanding, trial fitting, and figuring out where the high spots are that need more cutting and sanding. This was enough for one night... but we'll get back to this soon!


Wednesday, November 18, 2015

Cabin Top Prep

Not a whole ton of work on the plane today, but what wasn't accomplished physically was certainly made up for by overcoming the mental hurdle of transitioning to fiberglass work... today marks the first day of Section 43 - Cabin Cover!

Although no actual "fiberglass" work started yet, we did rearrange the shop a bit and perform the first few steps in the section, including marking 7 spots on each of the mid cabin decks, and marking off all the scribe lines on the cabin cover itself. I now see what people are talking about when they say the scribe lines aren't really all that great-- they're definitely not very straight and I think they only give the general idea of what needs to be cut!

Marks on the mid cabin decks for eventually match-drilling the cabin cover screw holes

Traced the scribe lines with a blue Sharpie to denote the first cut lines


An interesting step cut that will have to be made

Not all the scribe lines were very straight!

So that's pretty much it for today, but tomorrow we should be able to actually start cutting and sanding this thing.... eeek!!!!

Tuesday, November 17, 2015

Financing

I'm going to touch on a slightly "taboo" subject today... money.

So this is going to be another mostly off-topic post, at least as far as "building" the plane itself goes. However, you can't build a plane if you don't have the necessary parts and tools, and you can't buy parts and tools without money. Let's face it-- flying isn't exactly the world's cheapest hobby, especially if you want to own your own airplane. Even more so if you want that airplane to be nicer and newer than most rentals, and have some of the common "luxuries" you'd expect in a vehicle of any kind that costs north of six figures. Yes, building it yourself makes it more affordable than a comparable factory-built plane like the often-compared Cirrus SR22, but most of us builders don't really go this route based on financial reasons alone. Any way you slice it, you're in for a pretty hefty chunk of change by the time you get your fancy new RV-10 into the air.

That being said, you don't necessarily have to be "rich" to build your own airplane, either. We're not, anyway. Our house isn't anything fancy, and we drive beater vehicles straight out of an easy listening radio station (70's, 80's and 90's). I suppose I do have a pretty good job working as a software engineer, and yes it pays fairly well, but money doesn't exactly grow on trees around here either. I assume many other builders are in a similar situation... doing well for themselves but not exactly in a position to just shell out the money necessary to build a plane in hard cash. If you are one of those people, you're lucky, and feel free to skip the rest of this post. :-)

For the rest of us, we need to figure out a way to fund the project. Of course, strolling into your local bank and asking to speak with a loan officer, telling them you want to build an airplane in your garage, and that you need six figures of unsecured funding will make someone's day, but probably not yours. There are a small handful of financial institutions around the country that do specialize in aviation loans, and an even smaller subset of them (I've found precisely two, one through EAA and another through AOPA) that offer some sort of "aircraft construction loan" specifically for experimental aircraft. The good news here is that these companies absolutely love RV's because they have exceptional market value and excellent safety records, and are easy to assess. This translates to getting the best-case possible loan terms, which is great. However, these loans still have some pretty significant strings attached, with some examples being you need to purchase full hull in-flight insurance coverage the moment you sign the loan (big premiums, even though the plane isn't anywhere near flying condition yet), you must maintain xxx (high) amount in your checking account, and/or they need to send disbursement checks directly to the vendors to buy ALL the parts for your plane within 30 days (impossible, there are many purchases to make over many months from many vendors). Additionally, while the interest rates weren't "bad," they weren't really "great" either. So, I never ended up applying for any of these aircraft construction loans.

What I did end up doing was sometime last year I put together an incredibly complicated Excel spreadsheet (that only I understood) and planned out a revolving credit line sourced from a handful of decent-rate and high-limit credit cards, and a home equity line of credit (HELOC). I whipped up some rough numbers for time and cost, estimating the fuselage would be ordered here, the finish kit here, the engine overhaul here, etc etc. By the time the numbers came back, I had a plan that would "just barely work" by riding out the HELOC and credit cards in this gigantic torrent of revolving debt that I had concocted.

This plan has worked, in fact with a great deal of success, up to this point. Actually, it would probably continue to be successful up until completion of the project. However, it isn't ideal in my mind, and some of the credit cards involved have higher interest rates than I'd prefer. So, while continuing with this plan, I've been slowly and silently searching for a Plan B that might make things go easier for us.

In comes SoFi. Haven't heard of SoFi? Me neither, at least I hadn't until a few days ago. I got a random solicitation from them in the mail last week... you know, the ones you typically can just tell from the outside of the envelope that it's going to be in the trash in about 10 seconds. For whatever reason, I opened the letter first though. It sounded too good to be true, you can apply for a personal (unsecured) loan online in just a few minutes, and within a few days have your new loan direct-deposited in to your account. Oh yeah, and the rates were incredibly lower than any other similar loan I could find, including even the many-strings-attached aircraft construction loans. The amount you can borrow was astonishingly high too. No application fees, closing costs, origination fees, early repayment fees, fees of any kind! Ok, what's the catch? I started reading up on SoFi online and researching all that I could about them, and read all the fine print, and still wasn't scared away. Worst reviews I saw online about them were that they could be pretty selective, and they would sometimes drag on the approval process for a long time and request all kinds of documentation, and then ultimately turn you down. My credit is very good but not unrealistically high or top-echelon by any means, but I thought what the heck, I'll apply and see what happens, what's the worst that could happen?

Here was my application experience, literally: I went to the website and followed the steps to apply for a personal loan. They needed precisely *two* documents: a current pay stub and a scanned copy of my passport. Within 10 minutes, the application was complete and it was in for the approval process. Within 48 hours, I was approved and had the funds sitting in my bank account. For taking 10 minutes out of my day, I've just sliced my interest rates in half and fully funded the rest of my build, with plenty of headroom to spare now. What's significant about this is that the amount and terms of this loan are completely untouchable by any other bank I have seen, plus because it's a personal loan they don't even need collateral in the airplane. The rates are *almost* good enough where I just might consider not even refinancing when the plane is flying!

If you're in a similar situation as the one I described above, I'd highly recommend checking out SoFi. You can even click a referral link here, and you'll get $100 (I'll get a few bucks too). If doing the referral thing isn't your thing, I understand, honestly I always tend to roll my eyes at these kinds of deals. So here's a link to just go to their website at sofi.com, Either way you might find a surprisingly good deal. I know I did.

That's all for now.. next time we catch up I just might start finally attaching the cabin top to the fuselage!!!