Thursday, July 30, 2015

Return from OSH - Fuse Side Skins

One word sums up our experience last week at AirVenture 2015... wow! We had an absolute blast, from our early arrival Friday 7/17 to our departure on Sunday 7/26 the trip was filled with non-stop adventure and memory-making. Aside from two storms bracketing in our arrival and departure, the weather was literally PERFECT the entire rest of the week! I'll be starting a new section on this website for trip write-ups, and will post many more photos and stories there in the coming weeks. For now, I'll share a photo taken shortly after our return with a quick story:

Back from AirVenture 2015 with some new swag!

Among a few other events, we attended Van's official RV builder's dinner banquet on Tuesday night, which was attended by around 400 people and included a raffle drawing of maybe a dozen or so prizes ranging from t-shirts to tools to gift certificates. Neither Sarah nor I are typically too prone to win prizes at these kinds of events, but as luck would have it we both won something. Sarah won a Van's t-shirt and I won a Cleaveland 3/32" dimple die set... Yay! Both are pictured above. Our sincerest thanks go out to Van and crew, and Cleaveland Tool as well for the gifts... they will be put to good use, we promise!

Anyway, with all the excitement from Oshkosh winding down, bags unpacked, and things settling back into the normal groove it was time to pick up building where we left off. We had a relatively short night in the shop tonight but seemed to get a good amount done. We finished riveting all four fuselage side channels to the firewall and forward bulkheads, and attached the forward fuse longerons to the firewall gusset as well.

Mike riveting the F-1013-L longeron to the F-1001J-L gusset... happy to be back to building!

Sarah also stepped up to the plate with a bold move as well tonight... as anyone who reads this blog knows, I am so fortunate to have "SOS" with this build (significant other support). She is out here in the shop with me quite often and does an excellent job with anything from drilling to deburring to riveting to prosealing. However, she's always been reluctant to read directly from the plans and actually do a part of the build herself without my direct involvement/supervision/etc for fear of messing something up. All charged up from a week at Oshkosh, however, that changed tonight. While I was on a one-man-task pounding some rivets she asked, "What can I do?" and in short order she was reading from page 29-19 and fetching some parts from the shelf to start fabricating the rear vent brackets all on her own. Most of that can be done in parallel as a separate task while I finish some of the one-person tasks with the side skins... Awesome!

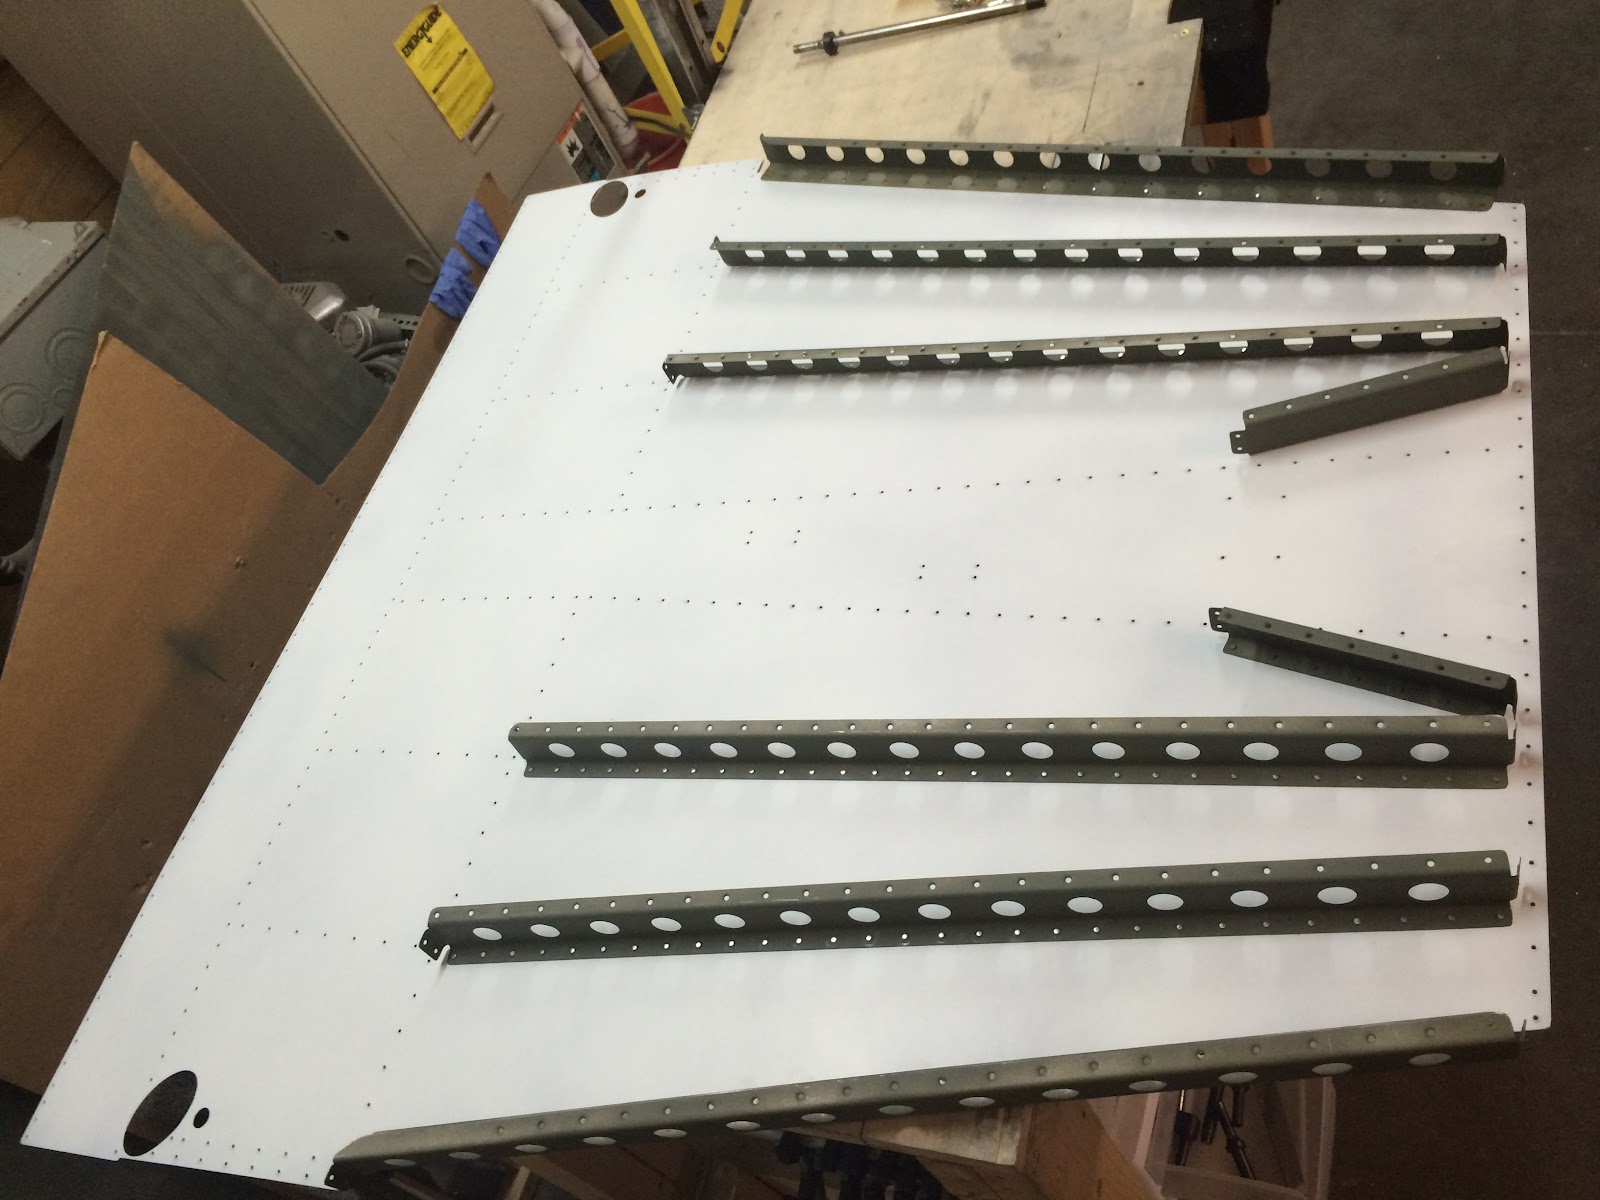
Aside from that, the next step is to begin attaching the skins themselves, but before we can do that we'll need to finish countersinking a few of those hard-to-reach holes around the spars. It's only maybe 6 or 7 holes (out of several hundred) left to do, but they will take some time and it sounded like a good stopping point for tonight.

"Fifi" the B-29 is in town at KCID this week and over the weekend, and although we already just spent some quality time with her at Oshkosh, we may be spending a bit more time with her through our local EAA chapter helping the CAF with logistics and security-type tasks over the weekend. If we're not out there doing that, we'll be in the garage working on the RV!

Thursday, July 16, 2015

Fuse Side Skins - Departure for OSH

Not much time to build or update the blog this week... it's been busy with work and getting packed and ready for the greatest week of the year! :-)

On Tuesday I did get some priming done over the lunch hour and started riveting the back seat bracing together. I'm not riveting the mid-fuse longerons into place just yet, in fact I may hold off until tailcone attachment if possible. It seems it may be easier to rivet the whole piece in at once rather than have it half-installed for a few months while we get to that stage.

Other than that, the only noteworthy progress was on Wednesday when I started riveting the forward fuse channels on the upper and lower sides. A few of the rivets are pretty tricky to get to and clumsy for one person to rivet and buck, so this may need to wait until after AirVenture to get any further.

Speaking of AirVenture... the time has come! Looking at the forecast, we're thinking it may be a better idea to try and sneak into the N40 tomorrow (Friday) rather than risk being grounded for weather on Saturday. We're hoping to get a good spot near the west bathrooms! Wherever we end up though, I'm sure it will be a great week regardless.

If you're planning on being at OSH15, we hope you'll find us and say hello at any of the Van's social events that are occurring throughout the week, particularly Sun-Tue (RV-10 dinner, RV social, Van's banquet, respectively)! As a sign-off for the week and tribute to AirVenture, I'm sharing a poem I just wrote, shamelessly stealing the theme and several verses from a similar poem I saw on VAF (Credit: Bill Greenley). Cheers, fly safe, and enjoy!

A Visit To Oshkosh

'Twas the night before Oshkosh, up reading the blogs
We could all feel the excitement-- even the dogs

Making a list, and checking it twice
All the stuff that we'll need to camp for eight days and nights

The charts were laid out and a yellow line drawn
With checkpoints from home base straight to Ripon

That's where it begins, now you must fly precise
I know this for sure, I read the whole NOTAM twice

From there we'll find the tracks and continue toward Fisk
Single file, ninety knots they say, to lessen the risk

We'll listen to controllers call out plane after plane
Telling us how to proceed, now that we're in their domain

"Rock your wings to acknowledge," they say with some haste
Making sure all the airplanes stay evenly spaced

Continue up the tracks, or turn right towards the east
It doesn't matter to me, just so we get there in one piece

Turning base in the pattern now, it looks like we're high
On path to land long, on that dot colored with dye

It's hard to stay focused, I hear someone take pics
Of a mustang holding short, and on final a T-6

I see thousands of people standing there at the fence
To know my landing's being judged is making me rather tense

Passing over the dot I hear tires go squeak-squeak
Heading for the grass, we're now home for the week

Taxi to parking, call "mixture, master then mags"
A volunteer in orange stops by as we start unloading our bags

Whisked over to the booth where we get bands for our wrist
Registration and info, and any way they can assist

On the way back to our site, registration in hand
We see more and more airplanes coming in here to land

Spots filling up quickly with planes big and planes small
Some eighty years old, and some built last fall

With excitement we cry "look, an RV!" as an airplane comes near us
But then we look closer and say with dismay, "it's only a Cirrus"

A Trimotor takes off with a great sound of thunder
Where else in the world can you see this kind of wonder?

With our bags unloaded and the plane tied down tight
We put up our tent and bed down for the night

Dreaming of forums and workshops, maybe meeting Bob Hoover
Or flying a simulator to try out that new maneuver

Here’s to the day and night airshows, and friends having a ball
Wishing for fair skies all week, and a "Happy AirVenture" to all!


Monday, July 13, 2015

Fuse Side Skins

Relatively easy night in the factory today. Derek came over for another round of building, and we were quick to put him to work countersinking the fuselage side structure, including the center section side plates and the forward and aft side channels. It was his first experience countersinking with a microstop, and just like last week he proved to be an instant learner and did an excellent job in short order! Thanks again Derek! :-)

Meanwhile, it was Sarah's turn to supervise while I got to work finishing the dimples in the F-1015A ribs discussed in yesterday's post (there was still a small handful that needed to be done). After that, I deburred and dimpled the parts of the substructure that needed it, including the powdercoated steel brackets on the firewall. I did end up breaking a blade on my EZ-Burr (first one so far), but in hindsight I know what I did to cause it. Swapped out the blade and we were back in business.

Last thing we did tonight was trim off a bit of aluminum from the flanges on each side of the firewall. For future builders, it might be easier/prettier if you just trim the flanges during firewall construction. These are parts F-1001M (L) and F-1001D (R), and the idea is to remove enough material from the top and bottom of the flange to allow access for drilling/deburring/riveting the holes you'll be putting into the WD-1002/1003 brackets. I'd guess that a 60-degree angle should be about right (in other words, cut away *more* material than a 45-degree angle). Refer to 29-14 Step 3 and associated diagrams for more info.

That was pretty much it for tonight, no pics unfortunately but we're getting super close to a priming session... possibly tomorrow, we'll see!

Sunday, July 12, 2015

Fuse Side Skins

***GOTCHA ALERT*** - This post contains a few items that confused me and required careful read-ahead in the plans, as well as one particularly nasty "gotcha" that appears to have tripped up more than one builder, including myself. The latter is also mentioned in the last entry on Tim Olson's site under "Fuse Tips" (as well as a few other build blogs) but I never saw them until it was too late.


Continued with the deburring tasks today, this time starting with the four Fwd- and Mid-Fuse R/L skins. It took about 4-5 hours to complete all four pieces, which involved tasks including deburring, edge-finishing, scuffing, and dimpling. Then it was time to see what was left to do. I've divided the finish-work into three categories: (1) loose metal parts, (2) skins, and (3) partially-riveted parts already installed in the fuselage structure. At this point, #2 is done and #1 is almost done except for countersinking and a small number of parts to dimple. Then, the focus will shift back to the fuselage for #3, for parts such as the bulkheads and center section side plate that need to be countersunk. I have to admit, countersinking is one of my less-favorite tasks, especially when there is so much of it do to. I guess I don't really *hate* it, but it does make a giant mess of shavings and doing the same thing eleventy-billion times gets a bit tedious.

For the longerons and fuse channels, I set up the microstop and #40 countersink on the drill press and went to town. I had to clamp a 2x4 to the drill press table for the longerons to glide over so that they could be fed through in the proper orientation:

The longeron countersinking process

Otherwise it actually went pretty well, and after a while I had a neat stack of countersunk metal parts, and a pile of metal shavings reminiscent of the pistachio shell scene in The Naked Gun.

One last thing I did before focusing back on the fuselage structure itself was to attempt to solve two mysteries I had running in the back of my mind (little did I know I was about to uncover a third mystery, too).

The first was what to do with the five 3/32" holes directly above the step in the side skin:

The 5 mystery holes above the step in the F-1070 side skin

The plans make no mention of what these holes are for, and there are no drill/dimple/rivet callouts, and no parts attach here at this stage in the plans. I had to dig pretty deep into the plans to discover that the F-1023B-L/R Baggage Floor Angles will attach here as shown in Section 33-2 Step 8 (and Fig. 4). That step mentions that these pieces need to be dimpled, presumably to match the side skins. One problem, the side skins had never been drilled or dimpled here yet! If I hadn't become curious, these holes would have remained untouched and I would have probably ended up in trouble later on. So, I clecoed these F-1023B angles to the skins, match-drilled, deburred, and dimpled them so that things go well in section 33. If you ask me, the steps between these processes should be presented/ordered a bit differently, and there is no reason I can think of that they shouldn't have you take care of this now. Dodged a bullet here for sure.

The second mystery I wanted to solve was the three nutplate holes along the upper flange of each of the F-1040 fuselage channels. The plans make no mention about installing nutplates here (or at least I couldn't find anything), but all the way in Section 35-7 Figure 2 they reveal what they are used for-- retaining the F-1042G wire cover. Looks like they specify a #8 screw, so I'll have to final-drill the nutplate holes #40 and #19, and countersink the #40 holes flush, and then install K-1000-08 nutplates into place. This is just another example of "missing" detail in the plans that I guess they just expect you to know to do it. This could all be done later, except one #40 hole for the aft-most nutplate is awfully close to a gusset attach point, and I think it would be pretty tricky getting a countersink in there at a later time. Better to do it now, I think. (EDIT: This turned out to be a "known" gotcha originally submitted by Chris Johnston and can be found on Tim Olson's GOTCHA page here... glad we ended up at the same conclusion!)

With all that behind us, we put the fuselage structure back into center stage and began countersinking the center section side plates. Before too long, I discovered another issue, this one being a real doozy. The F-1015A Outboard Seat Rib:

The F-1015A-L Outboard Seat Rib

I just talked with a friend and fellow builder Jon, who's building an RV-10 of his own and is pretty much at the exact same stage as we are, to double-check on something. A subsequent google search revealed that Jon and I appear to be the latest two victims of a nasty oversight in the plans. The #40 holes in the outboard face (or "web") of these ribs need to be dimpled. The plans *do* say to do this for the F-1018 ribs, which are part of the next section to the rear (partially visible at the right edge of the photo above). They make zero mention of doing this to the F-1015A ribs, however.

Additionally, there are some #30 holes that get match-drilled from the side skins into the F-1018 ribs, and the three aft-most of these holes need to be dimpled for a CS4-4 rivet according to Page 29-15 Figure 1. It would probably be best to do that match-drilling now in order to get the dimpling out of the way, because it will be very difficult later on.

In summary, here's what I believe really should happen during Section 26-5, somewhere between steps 1-6:
  • For the F-1015A-L/R ribs, dimple all of the #40 holes in the web of the piece, excluding the forward-most row that tucks behind the F-1004D bulkhead. Leave the #30 holes alone (careful, they crisscross!)
  • Dimple the flanges of the F-1015B-L/R Intercostals to match the dimples you made in the previous step.
  • When completing Step 6 on 26-5, the dimple callouts for the #40 holes in the F-1018-L/R are correct; however you should *also* dimple the three aft-most #30 holes that can be seen on the right side of the photo above. Are those holes not there yet? You'll want to fetch the fuse side skins and cleco this rib into place, and match-drill those #30 holes, then deburr and dimple the rib. Trust me, way easier to do now than when everything's all riveted together. As a final clarification on the #30 holes, none should be dimpled EXCEPT for these three. Refer to callouts on Page 29-15 Figure 1.
(Disclaimer: since these recommendations deviate from the order of events in the plans, please don't hold me responsible if they cause more harm than good... I'm only trying to help!)

In order to dimple these holes now, I took a small piece of steel plate and drilled a 3/16" hole near the corner, to fit a female dimple die. Using my rivet gun and die attachment with male dimple die, I carefully created dimples in each location. The dimples aren't the prettiest, but they should be perfectly adequate for the substructure here and I think we're out of the woods now with this particular gotcha... Whew!

Next on the agenda: Finish countersinking and dimpling the fuselage structure for the side skins, and prime all the loose parts and skins. Oshkosh officially kicks off in one week (although we'll be there even sooner than that)... yay!

Saturday, July 11, 2015

Fuse Side Skins

Started off this morning finishing up all the drilling tasks of the forward fuselage side skins, including match-drilling the longerons and upper/lower fuse channels. Drilling into the outboard face of the channels was pretty simple, but match-drilling the upper and lower flanges to the "three-fingered" firewall brackets proved to be a little tricky. The "fingers" on these brackets not only need to be held tight against the channel, but also need to be pulled in an outboard direction so that they nest further inside the channel, otherwise the holes you drill will just barely hit the edge of the part. I ended  up using two C-clamps, one in the X-axis and one in the Y-axis to get all the flanges oriented properly before drilling. Once one or two holes were made and clecoes could be put in place, it wasn't nearly as tough.

Anyway, once all the final- and match-drilling was complete, the whole structure that had been slowly clecoed together over the last several days could now come apart for deburring, dimpling, countersinking, scuffing, and priming.

Most (but not all) of the substructure for the Fuse Side Skins

We got through deburring all of the substructure parts and ended up calling it a night. There are a lot of parts both big and small, and the deburring task takes a considerable amount of time. We'll get through it all though I'm sure... hopefully tomorrow!

Wednesday, July 8, 2015

Fuse Side Skins

Today we are celebrating two things: (1) the wing kit was delivered one year ago today; and (2) it's Sarah's birthday (probably best to order this the other way around)! Even with the number of setbacks we faced last year with storm damage to the house and a number of other distractions and time-sucks, I feel like we've really made some great progress on the airplane and it's coming together very nicely.

Today was another (and probably the last for a little while) light day for work, which means it was a heavy day in the factory. I picked up where we left off last night working on the mid fuse side skins, match- and final-drilling the skins to the underlying structure. There are quite a few holes to drill, and many of the "lines" to follow aren't very straight or have confusing overlaps. To assist in making sure I didn't miss any holes, I started circling completed areas with a green Sharpie (I also marked "do not drill" holes with a blue Sharpie). After a couple hours, both mid fuse side skins were attached and drilled:

L Mid Fuse Side Skin after match-drilling

R Mid Fuse Side Skin after match-drilling

Turning the page to the next step (29-10), I had to pause and giggle a bit. I was looking forward to reaching this step, because when we had initially received the fuselage a couple months ago I was paging through the plans and stumbled across this page. The plans are typically pretty matter-of-fact and dry of any humor or casual commentary, as one might expect them to be. However, it appears that by the time you get to this part of the build process, Van's rewards you with just a bit of silliness:

Section 29-10, Step 1

The humor is definitely groan-worthy at best, but even so references to a Metric Crescent Wrench and a Sweaty Grunting Human are a welcome relief in an otherwise long and arduous process. The step itself is indeed kind of a pain, and really did end up doing some grunting and sweating... bending structural aluminum takes some elbow grease!

Me and my Metric Crescent Wrench, putting a twist into the F-1041-L

Once all four fuse channels were twisted into their correct orientations, it was time to modify the wooden clamping block we used on the mid fuse skins to work with the fwd fuse skins by routing out a 1/8" radius on the clamping edge and cutting a different angle along the side. Unfortunately I forgot to snap a photo of it, but other than using a differently-contoured clamp it's basically the same process as what was done for the mid skins. Once they were both done, the assembly could start being clecoed together, introducing a small handful of new parts including some that had been set aside in earlier sections. The resulting product was certainly photo-worthy!

The fuselage (L side) with side skins clecoed into place

The fuselage (R side) with side skins clecoed into place

Close-up of F-1069-R Fwd Side Skin

Starting to look more and more like a cockpit!

Inside the cabin, R fwd area

Pretty awesome! With all this clecoed together it looks like a giant "canoe" of sorts, although I'd imagine it probably wouldn't float all that well. That made for a pretty good stopping point, I think the next steps are going to be more drilling in the forward fuse area, followed by the always-disappointing tasks of deburring, deburring, and deburring.

Probably not going to be a ton more progress over the next couple of days due to some other things that need to get taken care of, and some longer days with work ahead... but stay tuned!


Tuesday, July 7, 2015

Fuse Side Skins

Awesome day of building today! I was able to get a little earlier start than usual today due to a short day at work, which made for a very productive evening. The first thing to do was to continue with the longeron bending process, this time making the two longer Fwd Fuse longerons. One of these pieces is over 9 feet long, which not only makes me nervous about getting it right, but also I'm sure it isn't cheap to ship me another one if I mess it up!

The Fuse Longerons laid out inside the fuselage. Left-to-right, F-1013L (92-5/32"), F-1046L (49-23/32"), F-1046R (49-23/32"), F-1013R (113-1/2").

Cutting, tweaking, bending, beating, banging, hammering, twisting, drilling, and deburring these four longerons took quite some time, but by the end of it I'm satisfied with the result. The F-1046R is probably the one piece I'm least happy with (it was the first piece I made), even after some re-tweaking attempts there's still a spot or two that look a bit wavy. I think the tolerances are still within the 1/16" called out in the plans, and I'm sure once the rest of the structure goes into place everything will sort itself out, but for the time being I'm still a bit nervous about that one. I'm probably just being a bit paranoid. Anyway, with these four longerons complete we could proceed with the next task of bending the Mid Side Skins. This requires making a 46"-long wooden block out of a hardwood 2x4 with some angled faces that are specified in the plans. I ran to the local lumber yard and grabbed a 4' long piece of oak 2x4 ($20 for a single, half-length 2x4!) and got started cutting it down to size. For future reference, it is WAY easier trying to cut it on the bandsaw than my first attempt using the table saw! In the end, I ended up with this piece:

The hardwood clamping block used to roll the fuselage side skins

Also shown above are the two aluminum F-1070A/B Roll Construction Angles that were fabricated and match-drilled to the side skins in order to be used as grips for the end of the skin being rolled. About this time, Sarah got home from her flight lesson and our friend Derek also stopped over to check out the project and help out a bit. He's also starting to build an RV-10-- he bought an already-completed empennage kit and will soon be ordering/starting on the wing kit. In the meantime, he'll probably be stopping over from time to time to hang out, help a bit, and gain some experience working in the factory with us. We welcome the extra set of hands anytime for sure! :-)

With the three of us in the garage and plenty to do, the Senior Project Engineer (yours truly) got to work delegating and assigning tasks. I showed Derek how we were back-riveting the Bottom Fuse Skins on to the Center Section Bulkheads (a few dozen rivets still needed to be finished), and he jumped right in and did an excellent job!

Sarah running the rivet gun and Derek holding the Cleaveland back-rivet bucking bar. Every rivet came out perfect from the beginning... Nicely done guys!

Meanwhile, I continued with bending the Mid Fuse Side skins, using the newly-minted clamping block and Roll Construction Angles:

I tried to fake a grunting face for the camera, but Sarah said it looked too natural... oh well. It was actually pretty hard work to bend these!

The completed roll for the R Mid Fuse Side Skin


After repeating the process for the L Mid Fuse Side Skin it was time to trial-fit them to the fuselage (by the way, the plans aren't very clear about the L skin. It's obvious enough that both R/L skins need to be done in the same manner, but there is zero mention of the L side skin until a few pages later when it is assumed to already be done). I had to go fetch the F-1006B Bulkhead from the tailcone assembly, which was suspended from our forward garage ceiling. After dusting it off and clecoing it into place, we could cleco the side skins on and see how we did with the rolling:

R Mid Fuse Side Skin, rolled to match the bulkhead

L Mid Fuse Side Skin, rolled to match the bulkhead

The end of the fuselage with both side skins clecoed into place, this is where the tailcone will mate up.

They fit! The rolled skins were quite easy to cleco into place and the curves seemed pretty smooth and natural. The R side has just a touch of a crease on the upper end of the roll, but I think it will be pretty easy to massage out once it's all put into place.

Next up, Derek and I got to work on some more fabrication and drilling for the baggage door seal angles and back seat braces. Once those were drilled and trimmed to spec, they could be installed into the fuselage, along with the four longerons that we made yesterday and earlier today. Installing them also involved unwrapping a few new parts like the L/R Mid Cabin Decks, which were kind of cool-looking parts.

Mike & Derek after installing the fuselage longerons and Mid-Cabin Decks for match-drilling

It's amazing how clecoing just a few parts into place gives the fuselage an appearance of being a lot further along! It's easy to get lost just staring at the plane and imagining what's going to go where and how it's all going to look when it's all done. These are some of the most rewarding moments when you can take a step back and do this. So much so, in fact, that I grabbed myself another beer and stood back doing just that. Seeing an opportunity to jump back in, Sarah grabbed the drill out of my hands and got to work on the longerons with Derek:

Admiring our airplane coming together from a distance.. this is how all project leadership should work!!!

After tonight's efforts came to an end, we were through Section 29-7 Step 3 in the plans. Excellent progress, and a happy night of smooth sailing. Here's to many more of the same kinds of nights!


Monday, July 6, 2015

Fuse Bottom Skins - Fuse Side Skins Begin

Started another marathon part of the build tonight: the 22-page long Section 29 - Fuse Side Skins! Didn't get too terribly far though, really just maybe about halfway through the first page of the plans. The first several pages appear to be pretty heavy on metalworking, including bending some longerons into shape from raw aluminum angle pieces, as well as rolling some skins into the desired shapes. Other than some pretty minor bending/rolling that occurred during tailcone construction last year, this will be basically the first time we do these types of activities, and there will certainly be a learning curve here to figure out how to make these bends correctly.

The first part of this section involves bending the F-1046-L/R longerons to match the curve of a template provided in the kit. The idea is to put the aluminum angle into a vise, preload it with one hand and strike it with a rubber mallet with the other hand. Doing this many times along the length of the longeron is supposed to create a smooth bend that should match the curve of the template. It took some practice to get the forces correct and figure out which areas needed more or less bending to get it to match, but by the end of this process I think I have a method figured out. I'll probably want to go back to the F-1046-R longeron (the first of the two that I worked on) and give it a once-over again... it's close to correct but I think I can do better. It's a somewhat tedious process that requires a lot of patience!

Sarah had some free time tonight too, so we were able to get started on riveting the parts of the bottom skins that required two people. In order to reach the top side of the rivets with the back-riveting gun, she had to climb into the airplane, which in itself is a pretty cool milestone. This made for really the only photo-op of the evening:

The first human to sit inside the fuselage!

After a quick session of back-riveting, we got about halfway through them all. We started with the most difficult-to-reach ones though, so hopefully the second half goes smoothly tomorrow (or whenever we can get back to it).

That's pretty much it for today, didn't get too far with Section 29 yet but I'm sure that will change in the coming days. Also can't wait for OSH15!

Sunday, July 5, 2015

Fwd Fuselage Assembly

Day 3 of our 3-day weekend build marathon! At this point in Section 28, the plans have you shift gears rather abruptly from riveting to fabrication of some new parts that won't even be used for the time being. The first of these two mini-fabrication sessions was to create two Seat Floor Assemblies from 3 different parts: Two of these parts are pre-punched aluminum sheet, while the third needs to be made from 1/16" aluminum angle.

The two Seat Floor Angles, 3/4" x 3/4" x 17-29/32" with a centerline drawn on one side

L/R Seat Floor Assemblies clecoed together for drilling

The process was straightforward and went very quickly. It was nice to be working on a new part, but also a bit difficult because the fuselage was sitting on two of my three workbenches that I typically use for these types of tasks. It will be nice once this section is complete and we can move the fuselage onto its own wheels (a yet-to-be-built castering wheel stand). We made it work though!

Once the Seat Floor Assemblies were prepped and shot with a quick coat of primer, it was time to move on to the second of two sub-chapters of this section: building the Mid-Seat Rail Supports. Again, this is a very simple, straightforward task that really can be completed at any time unrelated to any other part of the build thus far. Also, I might add that they are both great projects for new builders who may want to know what it's like to build an airplane and learn how to acquire some of the basic skills needed.

The Mid-Seat Rail Supports after drilling and countersinking

While the primer was drying on the supports, I could begin assembling and riveting the seat floor assemblies that had just dried enough to work on. A few dozen rivets and nutplates later, we had this set of completed assemblies:

L/R Seat Floor Assemblies, complete (top)

L/R Seat Floor Assemblies, complete (bottom)

By the time these were done, the primer had dried on the seat rail supports, so they could be riveted together as well:

L/R Mid Seat Rail Supports

That was a fun break from the current state of affairs with the main structure of the fuselage! Plus, it means we're almost done with section 28... the only thing left to do now is temporarily install the landing gear mounts (for the second and final time before they are installed for good) and match-drill them in a few locations. After making some measurements and markings, I installed them into position using the 5 bolts called out in the plans, and final-drilled 2x #12 holes in the forward brace.

Forward brace of the landing gear prior to match-drilling

The next thing to do was fetch the Fwd Side Skins and install them temporarily to use as a drill guide for the side of the landing gear mounts. This was kind of cool, because we got a sneak peek as to what the fuse looks like with the side skins on:

Fwd Fuse Side skin temporarily installed, R side

Inside of forward fuselage, L side skin temporary installation

That's pretty much it for now! After this, the landing gear mounts came back off again for more deburring, and we're now basically finished with Section 28 except for riveting some parts of the bottom skin. We'll get to that early on this coming week I'm sure! With any luck, we'll be through all the side skins before we head to Airventure 2015 in less than two weeks.... we're both getting very excited for that!


Saturday, July 4, 2015

Fwd/Mid Fuselage Join

Got up early this morning to get right back to building! I knew today was going to be exciting because the first thing to do was to attach the Fwd Center Section Bulkhead and then mate the forward and mid fuselage sections together, making one continuous piece of the fuselage! Took many photos of this ceremonious occasion:

Fwd and Mid Fuse sections prior to joining, looking aft

Fwd and Mid Fuse sections prior to joining, R side

Fwd Center Section Bulkhead, inside view

Aft Center Section Bulkhead, inside view

After a bit of finagling with the wing attach bolts and spacer plates, I got both halves lined up, skins layered appropriately and everything bolted into place:


Fwd and Mid Fuse halves mated together!

Fuselage is starting to have some real mass to it now!

It was really cool to see these parts come together and form a quite significant part of the fuselage. Lots more to go still, of course, but this was definitely a moment worth relishing.

Next on the list was to begin riveting everything together. I'll need Sarah's help for a lot of it, but she's busy packing for OSH15 (I can't fault her for that, haha) so it's just me in the factory today. I was able to do the double-flush rivets that join the Fwd and Mid Bottom Skins to the Fwd Center Section bottom flange and go beneath the landing gear mounts though. I had been worried about these rivets, because double-flush is always a bit tricky and I wasn't 100% sure I had countersunk them properly on both sides. I was relieved to see that all 14 (both sides) turned out well and I guess I was worried about nothing. Better than the opposite I guess!

Double-flush rivets to go under the landing gear mounts

We'll leave the rest of the bottom skin rivets for a later time, it seems we can carry on with the plans with them just clecoed into place for now. In the meantime, I finished up bolting the Fwd Fuse bulkhead together and riveting the remaining ribs to their respective bulkheads. The only other thing left for now is the bottom firewall flanges, I'm going to save those until I have some firewall sealant (at this point I think I'll be using 3M Fire Barrier 2000+ but I haven't ordered anything yet). Again, these rivets are in a location that will be accessible anytime, so there is no rush to do them right away.

With that, we are through Section 28-14 step 11, and we have a fuselage that is coming together nicely! The next steps appear to be some minor fabrication work to make the seat floor assemblies, followed by a second trial-fitting of the landing gear mounts for more match-drilling.

This afternoon we're off to a friend's house for a 4th of July celebration, so that's it for now. Happy Independence Day!


Friday, July 3, 2015

Firewall - Fwd Fuse Ribs

Happy 4th of July and 3-day weekend! Other than taking care of some quick things at work this morning, it was a long day heads-down in the shop bucking away on a few hundred rivets! Yesterday, I was able to get some time over the lunch hour to prime all the parts we had completed on Wednesday, so I was able to start off today finishing the firewall assembly. This first involved riveting the nose gear tension brackets to the forward fuse ribs, which went pretty smoothly but took some time just because of the number of rivets.

L Fwd Fuse rib and nose gear tension fitting

L Fwd Fuse Rib subassembly, prior to firewall attachment


Once the L and R subassemblies were together, it was time to attach them to the firewall, making the complete firewall assembly as laid out in Section 28 of the plans! Lots of photos to follow:

Firewall assembly, R aft side

Firewall assembly, aft side

Firewall assembly, L aft side


Firewall assembly, front side


Once this assembly was finished, it became possible to start assembling the entire Fwd Fuse section, including the Fwd Bottom Skin and floor stiffeners. The majority of these parts could be back-riveted using the embedded backing plate I have in one of my worktables, which makes for quick and consistent work and almost guarantees clean-looking rivets in the finished product. The only thing that made it (only slightly) more difficult was that Van's seemed to accidentally omit the rivet size callouts in the diagram... thanks!!

The legend in this section of the plans showing the rivet callouts... missing 3 of the 4 sizes... oops!

Early on in the "empennage days" this would have almost certainly meant a phone call to Van's, if only to double-check. However, now that we're this far along with the airplane it wasn't that big of a deal at all, and we knew just what size of rivets belong in each place based on the materials being used (also, to be fair the symbols tend to be consistent--but not always--for the rivet sizes). For anyone interested, from top-to-bottom the sizes go AN426AD3-5 (shown), AN426AD3-4.5, AN426AD3-4, and AN426AD3-3.5.

Fwd Bottom Skin with floor stiffeners installed, L side

Fwd Bottom Skin with floor stiffeners installed, R side


With the rivet-size-conundrum and back-riveting session behind us, it was time to join this bottom skin assembly to the firewall assembly with a few more rows of rivets. These were a bit more difficult to back-rivet because it was hard to get a particular row to sit perfectly flat on the riveting plate. I ended up attempting to do this but a number of the rivets didn't set properly and ended up sitting proud. This made for a mildly frustrating drill-out session (maybe 10 rivets) followed by re-doing them using the two-person back-rivet method (Sarah had gotten home from work by this point), similar to how the wing top skins were done.

Firewall and bottom skin riveted together

Firewall and bottom skin riveted together, R side

Firewall and bottom skin riveted together, L side

At this point, we are ready to install the center section bulkheads and mate the Fwd and Mid fuselage sections together... but it's getting late and this is most certainly enough progress for one day! Hopefully we can keep this pace up over the rest of the weekend!