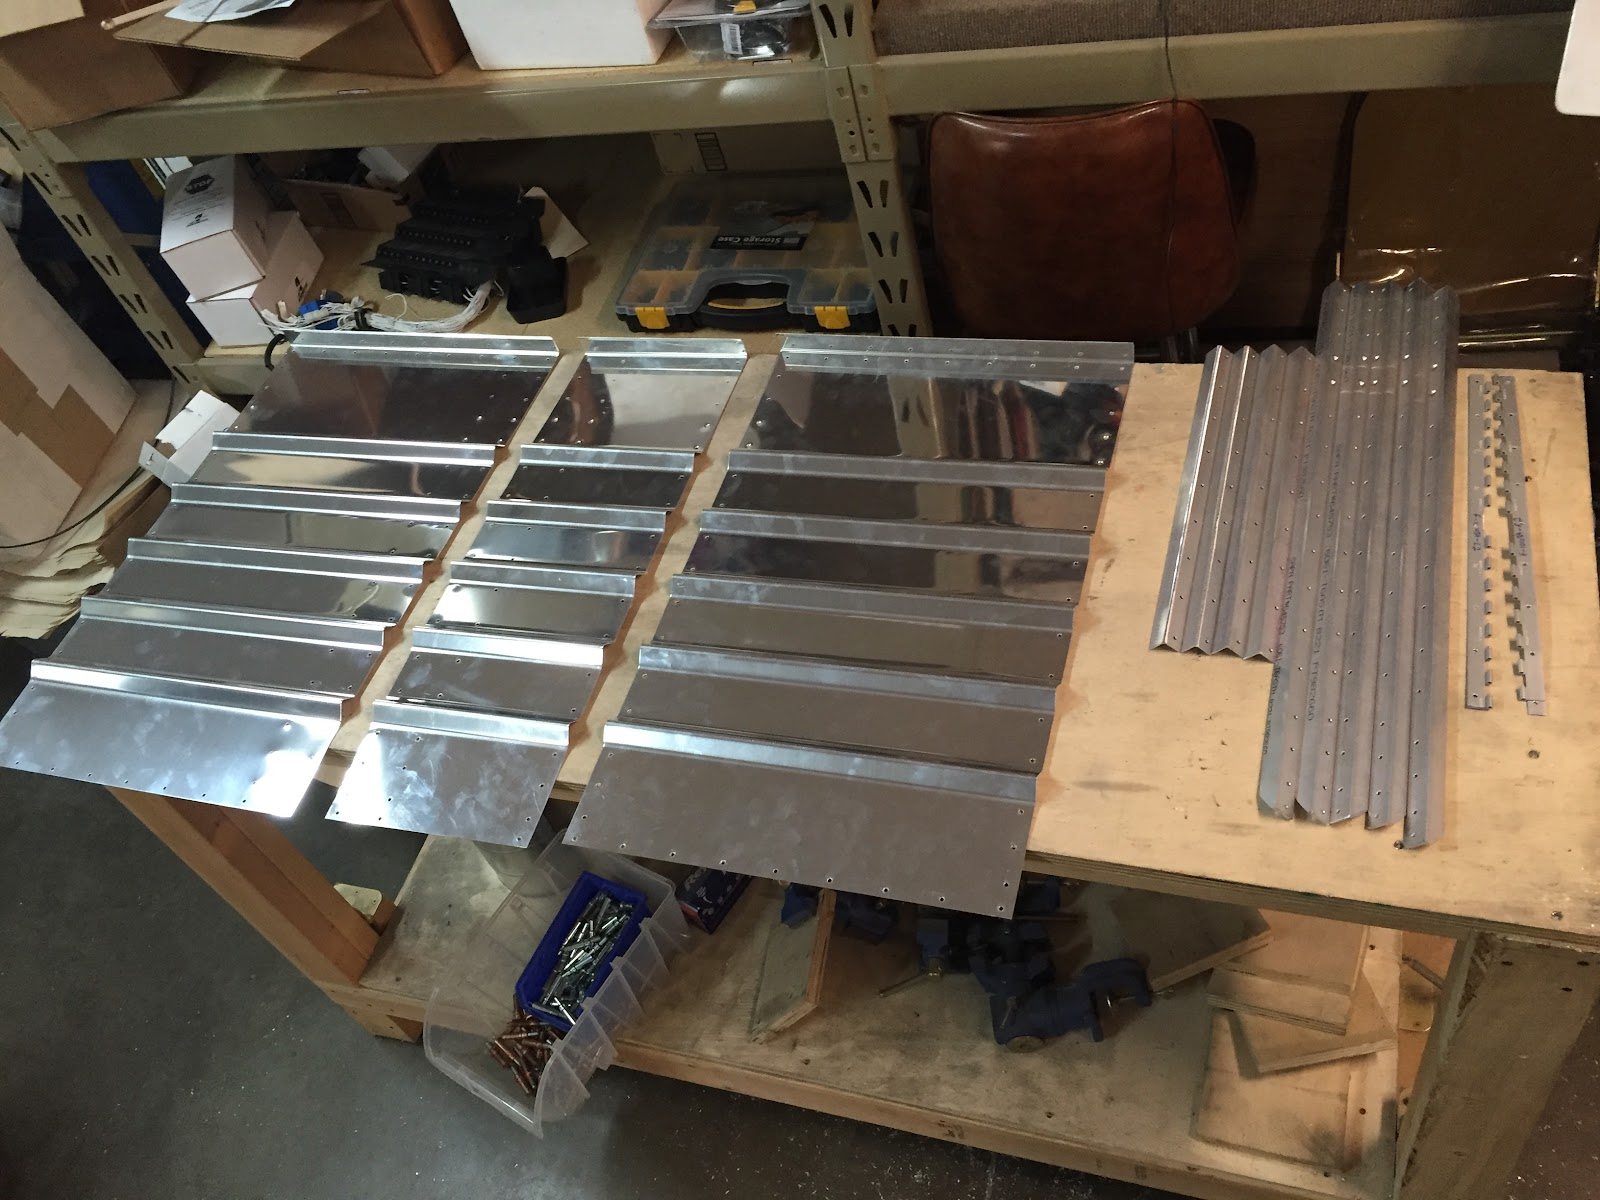
Wednesday, November 11, 2015

ELT - Flap System - Antenna Mount - Misc

Happy Veterans Day! It's been an interesting year, getting used to my new job where we observe all of the federal holidays and have the day off. Not that I'm complaining of course... more time to build! :-)

Today was an excellent day making progress in a number of areas. I started off by installing the ELT mount in the tailcone, which went fairly quickly even though it was a bit tough getting access to install blind rivets in all the holes between the mount and the J-stringers behind it. I ended up stacking two #6 locknuts on the rivet stems so that my rivet puller could get the grip it needed for the job. About 20 minutes of this combined with some awkward leaning, and the mount was in!

ELT mount installed, sans ELT

ELT mount installed, with ACK E04 ELT

Cool! Looks "official" now. You may notice that the mounting tray is not parallel with the tailcone stringers. I'm using the door sills as a reference for level, and discovered that the stringers in this location actually slant upwards just slightly. I used a level to approximate the angle here, and I believe it turned out pretty darn close. I have a 10-degree tolerance per the installation requirements anyway, and I'm confident that it's well within that. (EDIT 11/15/2015: A tip I later discovered, kind of an "oh, duh!" moment: if you have a smartphone like an iPhone with a compass/level app, you can use it as an inclinometer and get very accurate measurements to the nearest degree! Turns out this ELT is approximately 2 degrees off from perfection. Well within tolerance, but I could have done it perfectly if I had been thinking!)

Next on the agenda was to start assembling the flap system. Oops! Quickly discovered that before I do any final installation in this area, I'll need to install my belly-mount COM antenna doubler that I want to put in this location. So, on to that.

I chose this location for the antenna for a couple reasons. First, I wanted the antenna to be in the tunnel area so that it is always accessible from the inside. I've seen a number of builders (the majority, in fact) use the area under the rear seat to mount a COM antenna, but that just doesn't sit well with me. If you ever have to gain access to this area for whatever reason, you'll be drilling out hundreds of rivets and removing a pretty large part of the cabin floor. So I made the decision early on to put all the belly antennas in the tunnel area (I think there will only be two: this COM antenna, and a transponder antenna further forward).

The second reason for choosing this *exact* location in the tunnel beneath the flap torque tube is a bit of  accidental chance. Way back when we were first joining the forward and mid fuselage sections together, Sarah had a bit of an "oops" moment with the tungsten bucking bar, which had slipped from her hand and went flying through the air. In a slow-motion "noooooooooo!" sequence, fate steered the bucking bar's trajectory straight toward this area of the tunnel, resulting in a solid "clunk!" and producing a nasty outwards dimple in the bottom skin. We learned two things from this event: (1) Install an antenna in this location; and (2) secure the bucking bar to Sarah's hand with duct tape. Just kidding, of course. We weren't actually sure if we would install an antenna here yet ;-)

Reading some of the other build blogs online, I discovered that fellow RV-10 builder Justin Twilbeck actually had a similar mishap (see his blog post "Dent Happens" here) and decided to put an antenna at the scene of his accident as well! Funny coincidence.

Anyway, this location actually works out perfectly, as it is right at the "hip" of the fuselage, at the aft-most part of the bottom before it takes a turn upwards. I believe it really is actually an ideal location. So, I got started on making a doubler to place over it. I found a template for the hole pattern for the Comant CI-122 and used it to start making the doubler, and ended up with this part:

Comant CI-122 doubler, prior to enlarging circled holes for antenna connector and mounting screws (also added another row of holes near the left side in this photo)

After a bit of match-drilling to the fuse bottom skin and enlarging the holes, I was able to shoot the piece with primer quickly and await Sarah's return home from work to finish dimpling and riveting the piece into place. In the meantime, I continued with some miscellaneous tasks left over from the previous sections, including running some conduit along the right side of the baggage area and installing the cover panel, as well as installing the cover panel on the left side of the baggage area behind the rear seats. Lastly, I installed a number of nutplates that go in the various locations along the interior of the fuselage to secure cover panels and such. About this time, Sarah got home and we proceeded to dimple the bottom skin and rivet the antenna doubler into place:

Antenna doubler installed in tunnel. Antenna is offset slightly to provide clearance for elevator push rod, visible on the right

Comant CI-122 screwed to the bottom of the fuselage

Looks neat! I didn't have long enough screws for a permanent installation, but they worked perfect for a trial fit. Seems pretty solid and sturdy here and should work great!

For the final chapter today, I finally got to what I had set out to do earlier today, which is to install the flap system. I had already drilled and prepped most of the parts on a previous day, so today it was really just all about installing everything into the plane. I quickly discovered my first issue, which was that the holes in the fuselage side skin were too small to fit the flap torque tubes. I couldn't figure out any other way to get both tubes into place, and ended up enlarging the skin to match the underlying holes at 1-1/16". Then the next challenge was installing the UHMW bushings and getting everything oriented properly. I discovered another problem: the cutaways for the powdercoat weren't exactly in the correct locations on the torque tubes! This caused a huge increase in friction, and the tubes were very difficult to rotate.

L torque tube inner end, line drawn where bushing extends to

Each of the four locations had varying amounts of overlap, so I traced lines on all ends and carefully ground away the powdercoat, and polished the surfaces on the scotch brite wheel afterwards. Re-installing the tubes showed a dramatic reduction in friction! Good stuff.

So after about an hour of bolt-installation and rigging, we had the whole works put together!

Sarah is happy. Please move your hand though so we can see!

There we go! Flap system installed and ready to go

Sarah wanted to take a picture of me tightening the last bolt holding the actuator to the torque tube arm (visible above with no nut)

With that, we were able to hook a drill battery up to the flap motor and presto... The flap arm appears to work perfectly!! Wahoo! This is the first electrical part that is permanently installed to the airframe now. Exciting times. We ran the flaps up and down a couple times until the excitement wore off a bit and decided to call it a night. Big day of building today, and all ended up going very well! Tomorrow if the UPS gods are shining on us we should get some more fittings to satisfy our insatiable appetite for Aircraft Spruce packages, and we can continue with the fuel system. Maybe we'll also get to install more of the control system, even the control sticks! 'Stick' around!!


Tuesday, November 10, 2015

Rear Seats - ELT Mount Part 2

Finished Section 42 tonight! Yikes, running out of things do to in the fuselage kit short of the Cabin Cover. Got some time in over lunch today for a quick priming session. Primed the components for the rear seats, the elevator control rods, and the ELT mount that I had fabricated the other day. Got back to it after work and was able to rivet the rear seats together in fairly short order. Unfortunately Sarah had to proctor a pilot exam at the airport so I was flying solo tonight, so to speak. Derek came over for a bit to watch the excitement though, and before long both rear seats were set into position!

Custom 60/40 Rear seats, riveted together and laid into place

Right "40" seat leaned forward to show split

The whole assembly took about an hour, maybe less, to rivet together... awesome! Getting good at this riveting stuff, now that we're getting close to being done with most of the rivets on this plane. Oh well. Next thing to do was rivet together the ELT mount, which looks like this:

ELT mount riveted together

It's a fairly simple part made out of 0.063" aluminum sheet, two angle aluminum pieces to mate up with the stringers in the tailcone, and a short piece of J-channel going vertically between the angles. I'm not sure if I needed to use aluminum as thick as 063 but I had been dabbling with that thickness for the panel, had some scrap handy and figured why not. I think I could have probably used 032 and an extra J-channel instead, and saved a fraction of an ounce or something in weight. I would like the ELT to be mounted as securely as possible though, not only for obvious reasons, but also if we want to follow DO-204 compliance standards, taken from paragraph 3.1.8:
"The mounts shall have a maximum static local deflection no greater than 2.5 mm (0.1 in) when a force of 450 Newtons (100 lbf) is applied to the mount in the most flexible direction.  Deflection measurements shall be made with reference to another part of the airframe not less than 0.3 m (one foot) or more than 1.0 m (three feet) from the mounting location."
I'm not sure if I've heard of anyone ever actually test this, but the point is we want it to be as solid as possible. I believe that this part should easily satisfy this requirement. Anyway, that was pretty much it for tonight... I have tomorrow off from work so hoping if all goes well it will be a big day in the factory to make some good progress!!!

Monday, November 9, 2015

More Fuel System - Revised Diagram

Continued working with the fuel system tonight. Actually, it started earlier today when I sent off a few emails asking for price quotes for a number of braided stainless lines to go between the fuel selector and the various attach points. I got quotes back from two of the three places I asked, with prices ranging from $500 to almost $1000! For 8 hoses, each no more than 2' long. Ouch.

So I got to thinking, do I really "need" flex lines to go to the selector? It might be nice, but it is by no means a requirement. It may actually be better without them, because the fuel selector would be suspended in space in a fixed location, with the six hard lines going to it. Then the tunnel cover will come down over the top of it and screw to it. I think I'll try to go this route, or at least see if we can make it work before shelling out a ton of cash for some unnecessary "bling" that will be concealed beneath the tunnel cover anyway.

I started by making two hard lines going from the send and return fittings previously installed in the tunnel last night. Just those two lines were enough to hold the selector valve rigid in space in the correct location. Nice! Now just to make 4 more lines. Oops, I'm running low on AN fittings again. Gotta place another order with Spruce and we're be back on hold for a few more days. No big deal. In the meantime, here's a revised diagram of the fuel system layout:

N165MJ Fuel System Design - Second Draft

This diagram is pretty similar to the previous one (link here) with a few minor changes. Most notably, the regulator (or pressure relief valve) has been moved into the tunnel, and taps off of the inlet to the mechanical fuel pump instead of the servo. I've also ditched the filter between the mechanical pump and servo in favor of a gascolator in a more conventional location. I also threw in a check valve on the aux tank feed and a few more fancy labels.

Labeled photo of current fuel system (masking tape covering 'tee' inlet and outlet fittings)

Since the firewall-forward portion of the system is still TBD, the only part of the diagram that has been semi-finalized is the portion within the tunnel, visible in the photo above. The plan, however, is to run the "Send" line up to the inlet of the mechanical fuel pump, and tap off a "Return" line back to the firewall at that location. With this design, a failed relief valve would only affect the boost pump and not the mechanical pump. In this way the engine cannot lose pressure without a dual failure of both the mechanical pump; and the boost pump and/or the relief valve. This type of reliability is now identical to a traditional aircraft fuel system, with a significantly longer purge/return path. More importantly, the system is still fully forward-compatible with upgrading to an EFI system in the future if/when we go for that.

The only design limitation I can think of is that the boost pump should not be run with the fuel selector in the OFF position (and the mixture in cut-off position). This would result in a condition known as "deadheading," where both Send and Return lines are cut off, resulting in the fuel not being able to go anywhere and causing a spike in pressure. This is a condition that should really never occur anyway, especially while in the air, and the only thing that would happen in this scenario is a tripped breaker for the boost pump. Likewise, fuel cannot be transferred into the system from an auxiliary tank in this configuration for the same reason. That seems intuitive enough, though... fuel gets transferred into the selected tank, so if the selector is OFF then no fuel can be transferred! Also, there is no reason to run the boost pump with the fuel selector OFF, either. This will be placarded though, just to be clear and thorough.

That's pretty much it for tonight! Not much building really... a lot more thinking and planning, with a side of ordering more stuff from Aircraft Spruce. Tomorrow, I feel, may consist of a bit of a priming session if we're lucky! Stay tuned...

Sunday, November 8, 2015

More Fuel & Brake System

Finished the brake lines (Section 36) including the parking brake valve today! I ordered a 3' long control cable from McMaster (P/N 3125K44) along with a clevis and control knob, and fabricated a mounting bracket for it to attach to the tunnel wall and actuate the parking brake lever. Everything lined up as planned and it seems to work perfectly! I secured all the brake lines in place and tightened the brake valve mounts and took a few pics of the brake system:

Brake lines and brake valve in tunnel

Brake lines terminated on firewall

Parking brake valve with control cable mounted in place.


Demonstrating the clearance between the elevator/aileron controls and the brake valve/control assembly. In a worst-case scenario with the aileron control rod touching the bottom of its cutout, there is still about 1/4" between it and the clevis for the parking brake, which itself is in a "parking brake ON aka on-ground-only" position. The elevator control passes over the top of the valve with at least an inch or so of clearance.

This location for the parking brake valve should work fine... at least that's what I'm thinking so far. Next up was to start making components for the fuel system in Section 37. Since I'm "rolling my own" boost pump and return line, and also moving the fuel selector forward about 6" to make room for the armrest throttle quadrant, the fuel line measurements in the plans will be of little use other than to use as a general guide. The first thing to do is actually build the boost pump module, which I did by making two U-shaped pieces of 5052-O 3/8" aluminum tube:

Check valve (left) and boost pump (right) connected via two U-shaped tubes and fittings. Inlet is at the bottom tee, outlet is at the top.

The black jacket over the pump is an insulation sleeve I found online for fuel pumps, and it should help the pump run both cooler and quieter. Next, I started with the task of mounting the pump assembly and the pressure relief valve into the tunnel. Sarah and I riveted the two little pump mount brackets to the forward fuse bottom skin (deferred from way back in Section 28) in their normal locations. We had held off on riveting these before because we wanted to make sure we could make use of them and wouldn't have to relocate them or make a custom bracket. It turns out the standard locations work great, and we can put the boost pump module in the aft and center location, with the pressure relief valve in the forward location. This means the "send" line will exit the firewall on the L side of the firewall, and the "return" line will enter the firewall on the R side. So, with this plan in mind, I got to work getting it all installed.

Boost pump module installed in tunnel. Pump is secured via the standard hose clamp mounting method, and the check valve is secured to the L tunnel side with an adel clamp and #8 flush screw.

Larger view of the forward tunnel area, with both fuel Send (L) and Return (R) fittings visible below the heater outlets.

Next, more 3/8" 5052-O tubing had to be bent and installed between the firewall and the modules, as well as one run going back to a fitting on the rear R tunnel wall that will be the aux tank fill inlet. This line will be plumbed to a small panel in the rear seat area accompanied by a vent line and electrical connection. When an aux tank is installed, we'll be able to flip a switch on the panel to turn on a transfer pump inside the aux tank which will feed fuel to the fuel return line downstream of the pressure relief valve, allowing fuel to be fed into either the R or L fuel tanks, depending on the fuel selector.

Aux fuel inlet line visible above the rest of the fittings, with line swooping aft and then below the rest of the brake and fuel fittings. Also visible: tunnel entry points for fuel return and brake lines.

Aft tunnel area with everything installed

Forward tunnel area with everything installed

Boost pump module and pressure relief valve assembly close-ups. The taped-off fitting on the upper left side of the photo is the fuel inlet (from fuel selector send outlet), and on the bottom center is the fuel return outlet (to fuel selector return inlet).

Overview of the tunnel area from the firewall looking aft

That's pretty much it for today! Lots of good progress. The astute observer may notice a lack of pipe thread sealant on the exit side of the pressure relief valve, where there is a reducer and tee fitting for the fuel return and aux feed lines. I'll need to pressurize the system once and double-check the pressure setting for the relief valve, as it can be adjusted via a hex key inserted through this end of the valve. I figured it would be worth it to not seal these threads yet since they will likely be coming back off again anyway.

Other than that, I took some measurements for the stainless braided lines I'll need to buy to go from the tunnel entry points in the rear of the tunnel and up to the fuel selector, and also the two lines coming from the selector to the send and return lines. Until I can get them ordered and delivered, it's on to something else... maybe priming and assembling the back seats? We'll see!


Tuesday, November 3, 2015

Rear Seats - ELT Mount

Finished all the prep work for the rear seats today! Started by trimming and drilling the upper F-637C braces that nest inside the upper edge of the seat backs. This was pretty much the trickiest part of the whole section, although it really wasn't that bad. The vertex of the pieces need to be rounded in order to properly nest inside the seat back. I figured out a way to do this by carefully holding the piece up against the fence on the bandsaw at a 45-degree angle (so both flanges are in contact with the fence), which presents the vertex to the bandsaw blade at the perfect angle to neatly trim it off. You have to be careful to set the fence in the perfect position so just the right amount gets trimmed away, otherwise you'll end up with two separate flanges and a frown.

The vertex of the aluminum angle being fed into the bandsaw

View from above

The trimmed vertex, after a bit of cleanup on the belt sander

After drilling and clecoing, I was able to place both rear seats into position for a photo shoot:

The back seat frames!

Rear seats with custom 60/40 bench modification (center piece not yet trimmed)

Closeup of the 1/4" gap between the two halves

I had previously marked a cut line for the center F-637A seat back panel so that it doesn't overlap so much of the left side panel. Once everything came back apart, I made the cut and deburred all the parts. This was the first real deburring session in a while, it felt... great.

Finalized rear seat back parts, after deburring, ready for primer!

Next, I got to work on the ELT mount. I had previously made a mounting tray while building the empennage kit out of 0.040" aluminum sheet that was bent using my home made brake to go between two of the stringers in the tail cone, directly to the right of the battery location. Although I like the location, I didn't like the quality of the tray I made. I felt like I could do better with two pieces of aluminum angle and a flat (not bent) piece of aluminum sheet. So, I took a few measurements and got to work on "v2.0" of the ELT mount. It came out pretty good, I'm very happy with it, although I don't have any pics of it yet. I think I primer session is in our future pretty soon, and we'll be able to have a number of parts ready to rivet and final-install into position.

My fuel fittings should be here sometime this week, and we'll be able to get back to business on sections 36/37!


Sunday, November 1, 2015

Rear Seats, More Panel/Tunnel/Center Console

Started off this morning continuing with the panel mockup and layout. I had a new idea that I think I'm going to move forward with regarding the placement of the GMC-307 autopilot controller. I'd like to put it at the top and in the center of the panel, where you see flight control panels in many larger aircraft. The problem is, there is a support rib behind the panel in this area that Van's doesn't want you to mess with. I know of many people who have messed with them anyway and come up with their own methods of stiffening them, but I'd like to avoid that if I can, especially with the center rib that also is a load path for the cabin cover. Since the GMC307 isn't a very deep unit at less than 1.5", I had an idea to make a little "pod" to put it in and place it in front of the panel, screwing it to the underside of the upper skin and securing the back side to the panel. This way, I won't have to mess with the support rib, and the control panel will be in an even better position! So, I made the front face panel for a "pod" that measures 2.5" x 9" with the bottom two corners radiused. Looks pretty neat! Now to just build the remaining structure and make it look good...

Additionally, I got to work on other parts of the panel including the bottom support brace (some people call it the "switch bar"). It always bugged me that the way it's designed, it doesn't sit flush with the panel and is layered behind the panel itself. So, I made up a 1" wide strip of 0.063" aluminum and match-drilled it to the switch bar to bring it up flush with the panel. I think I'm going to install switches either at or near the seam between the bar and the panel, and then trim the seam with some chrome accent. It looks cool in my head, we'll see if I can make it a reality :-)

Doing all this with the switch bar made me re-think the center console idea a bit that I had earlier. I can make a panel out of 0.063" aluminum and insert it into the middle of the strip on the switch bar, making a perfectly seamless and flat transition from the lower console to the panel! So, I grabbed some more 0.063" sheet and got to work making another center console. I like this WAY more than the piece I made last time. For "cool" factor and more mockup purposes, I got out the fuel selector and the throttle quadrant and set them all into position for a photo.

N165MJ Panel Mockup #2

I think this should work nicely! Oh, and don't mind the armrest. I had a few people ask about it, I got it off ebay for about $30, it's for a Nissan Versa I think. It's about the right size, but it's also about the quality you'd expect for an aftermarket auto interior part sold on eBay and shipped direct from China. It also has a nice little toll change tray inside, which will come in super handy for all those fly-through toll booths you see from time to time. So, I don't think this is "the" armrest for this plane, but it is at least "an" armrest that I can use for mockup purposes, and maybe build my own that will be similar but better, and integrate the quadrant to it.

The last thing I did with the panel shenanigans was cut the tunnel cover at the point where the console meets the cover. This way, the middle part of the cover can be removed without pulling out all the avionics behind the panel if the fuel valve, parking brake, controls, etc need adjustment or service. Pretty straightforward deal, hoping it works out nicely!

With that, Sarah wandered out into the garage (panel stuff doesn't interest her... silly girl :-P) and we continued with the rear seats. Lots of measuring, marking, drilling, and clecoing. Eventually we had both sides drilled and test-fitted into position. Then we grabbed my extra F-637A seat back and laid it over the F-637A already in place for the left seat, and slid it out until it was 1/4" away from the right side seat. A few match-drills later, I think we were able to pull off making a 60/40 split bench backseat with minimal extra parts and effort! Pics to follow.

That's it for tonight, I think tomorrow we'll probably just continue on the back seat and get that finished up. Getting close to being "done" with everything except the cabin cover....... fiberglassing is imminent!


Saturday, October 31, 2015

Brakes, Fuel, Flaps, and Panel!

Big day, lots of little stuff. Oh yeah, and Happy Halloween! It was nice to get back to building after the whole ordeal of unpacking the finish kit. We started this morning by flaring and installing the remaining two brake lines, and then final-attached the -AN fittings to the parking brake valve for a first installation. I've decided to use Loctite 567 as a thread sealant, which seemed to get the best reviews on its performance overall. It smells pretty good too... Sarah claimed it smells like a "hotel lobby with a swimming pool nearby." I would have never made that association, but, yes once she said that, that's EXACTLY what it smells like.

Attaching the AN fittings to the parking brake valve using Loctite 567

The completed fitting installation

We then test-fitted the parking brake valve with all four lines connected to it for the first time. It fits perfectly! Now the only thing left with the parking brake valve is to figure out a control mechanism and get the necessary hardware for it. We'll get to that at some point eventually.

In the meantime, it was time to get started assembling the fuel system. I had ordered a number of fittings necessary to put everything together, but I quickly discovered I was in need of just a couple more. No worries, I'll tack them on to the next order from Spruce. Until then, since I had the Loctite 567 out, I could still install a few fittings into the various fuel system components.

The 100-micron fuel prefilters with AN-6 fittings installed

Walbro fuel pump with AN-6 fittings installed

I then made two brackets to attach the fuel prefilters to the landing gear mounts under each seat out of angle aluminum. It went pretty smoothly, and I think I have the finalized fuel system routing/layout figured out. I'll make a diagram here in the next couple days and post on here.

Moving on to see what I could work on, I got back into Section 40 and made 4 little spacers used to attach the flap actuator to its brackets:
The four spacers placed next to their respective steps in the plans

Those spacers were kind of a PITA to make! They are quite small, and it's really hard to hold them square against the bandsaw and belt sander, but with a bit of patience and burnt fingertips we got them made! The dial caliper works really well here to check measurements and end up with a perfectly-sized piece.

The last thing today before calling it quits was to get back to Section 31, Upper Forward Fuselage. We're basically done with that section except for some dimpling and riveting, but I don't want to do too much more until I really finalize my panel layout. So, I clecoed the assembly back together and started with one of my all-time favorite pastimes, avionics daydreaming.

Initial proposed general panel layout

2x Garmin GDU 46x displays, Garmin GMC 307 control panel, and GRT Mini-X backup EFIS

Still LOTS more planning needed for this panel, and even more money to spend on it. The main thing I wanted to do now though is see if I can figure out which parts of the underlying structure will need cutouts and modifications to support the layout I have in mind. I do want to have my autopilot control high and centered, which may require some modifications to the center rib for clearance. I'll need to get some final measurements and start making those cuts. I also need to figure out how I want all the switches laid out. I'd like to keep the panel as symmetrical as possible, and allow for PIC'ing from either the left or right side with minimal difference in usability of the panel. Like I said, lots more to figure out here, but I thought I'd at least share my current thoughts of what I'd like out of this panel.

That's pretty much it for now! I think the plan for tomorrow is to finish up the rear seats, and maybe some other miscellaneous shenanigans... stay tuned!


Thursday, October 29, 2015

Finish Kit Inventory Complete - Deletions/Additions Breakdown

It's been an exciting couple days of inventorying the finish kit and ordering parts! First things first, a picture of the sorted finish kit parts (along with a few doodads from previous kits):

When this rack is empty, the plane is done! The plane isn't done.

The main wheel pants and prop spinner, or as I like to call them, "fancy hats".

Unpacking and sorting was fairly painless, and there were no errors, even with all the additions and deletions I had requested. Speaking of which, I should probably do a quick writeup of what was modified from the standard kit, and what third-party parts I'll be replacing the deletions with. First, here is the list I sent to Van's to modify my finish kit order. I tried to research as best as I could by reading through a number of other build log sites and emailed a few folks who've built -10's, and decided on the list of things that I wanted to modify as follows:

  • Deleted tires and tubes
    • (-) U 15x 6.0-6 (x2)
    • (-) U 15x 6.0-6IT (x2)
    • (-) U 5:00x5-6 (x1)
    • (-) U 5:00x5-6IT (x1)
  • Deleted main wheels and brakes
    • (-) U-00011 (x1)
  • Deleted nose wheel and axle
    • (-) NW501.25 (x1) nosewheel
    • (-) U-1009 (x1) axle
  • Deleted intersection fairings
    • (-) U-1019-L (x1) lower L intersection fairing
    • (-) U-1019-R (x1) lower R intersection fairing
    • (-) U-1020-L (x1) upper L intersection fairing
    • (-) U-1020-R (x1) upper R intersection fairing
  • Deleted windows
    • (-) C-1003-L (x1) L door window
    • (-) C-1003-R (x1) R door window
    • (Windshield and side windows already deleted from fuselage kit)
  • Modified door components
    • (-) C-1016 (x2) door strut
    • (-) WD-1023-PC (x2) strut bracket
    • (+) C-1016HD (x2) heavy duty strut
    • (-) C-1021 (x1) safety latch doubler angle
    • (-) BAG-542 (x1) safety latch hardware
    • (-) BAG-543 (x1) safety latch hardware
  • I also added a few firewall-forward components, because I won't be buying the full FWF kit
    • (+) VA-168 (x1) sender mount
    • (+) VA-133 (x1) oil pressure hose
    • (+) BAF-IO-540 (x1) baffle kit IO-540
    • (+) VA-187 (x1) flanged duct
    • (+) FAB-360/540 (x1) filtered air box
    • (+) VA-182-PC KIT (x1) throttle/mixture bracket kit

With those modifications, the following items were then purchased from the following vendors:
  • VansAircraftTires.com
    • RV-10 New Builder tire/tube package (incl Desser retread tires and tubes, 2 main 1 nose)
    • Cee Bailey windshield, door windows, side windows package
  • MATCO Mfg
    • WHLWI600XLT-2 (x2) Wheel/Brake assembly, each
    • WHLNW511.25 (x1) Nose wheel
    • WHLAXLE24 (x1) Nose wheel axle
    • WHLA24SPKIT (x1) Nose wheel axle spacer
    • WHLARV10SL (x2) Rear spacer for wheel/brake installation
    • MSCTRA1.5 (x2) Washer for wheel/brake new installation
  • PlaneAround
    • NEW180 (x1) 180-degree 3rd safety latch kit, new door
    • DS2 (x1) Door strut attach brackets, pair
    • RV10DPG (x1) RV-10 SS angled door pins w/ delrin pin
    • WFSPCR (x1) Wheel fairing bracket spacers, pair
  • Aerosport Products
    • RV10030 (x1) RV-10 interior door handle kit, med gray
    • RV10051 (x1) RV-10 low profile exterior door handle kit
    • RV10048 (x1) RV-10 seat lever kit
    • RV10005 (x1) RV-10 cowl pin cover
  • Rvbits.com
    • RV-10 Intersection fairings, set of 4
One kind of funny thing that happened with my Matco order, I didn't realize the wheel/brake assemblies were sold individually (to my defense, the part number ends in "-2" and it would be expected to sell in pairs, so I made an assumption). So, I ordered just one main wheel. Quick to notice my error, a representative from Matco sent me the following email:

"Two units would be required."

I had to laugh for a good minute at the polite yet to-the-point wording of the message. My mistake! I wrote back and modified my order accordingly. Thanks to Matco for catching the error and preventing an even more embarrassing situation later on!

So the big question I always had and never really got a good answer for until I did this all myself was, how much do all these "upgrades" cost? Well, I decided not to post individual part-by-part dollar amounts of everything here because prices tend to change over time, but I'll try and list off the general, rounded costs of each upgrade (excluding other costs such as shipping), and the rationale behind each:
  • Desser tires instead of new from Van's (delete $300, add $350 = +$50): The Desser retread tires come highly recommended from those who use them. It turns out that a retreaded tire in the aircraft world for some reason is actually held to a higher standard than a factory-new tire and they are reported to last quite a bit longer. Also, they are apparently a bit "meatier", which is important for the first installation because the wheel pants will need to be trimmed around them, and you want to have the fairings give ample clearance for them.
  • Matco nosewheel/axle  instead of Van's (delete $125, add $220 = +$95): This is arguably the most important upgrade, according to most current RV-10 owners. The wheel Van's ships is slightly under-sized for this application, and the axle is of a poor design, causing it to rotate against the fork and cause premature wear and damage. The Matco parts seem to resolve the issue and provide trouble-free operation. There is a plethora of information on the internet about the RV-10 nose wheel issues and the Matco fix.
  • Matco main wheels/brakes instead of Cleveland from Van's (delete $775, add $950 = +$175): The Matco wheel and brake option provides a better design and increased braking ability, which is extra important on planes like the RV-10 with a castering nosewheel that must be at least partially steered with the brakes, especially at low speeds. I've spoken to a number of RV-10 owners including one right here in Cedar Rapids who highly recommended this modification.
  • Intersection fairings from Rvbits (delete $100, add $175 = +$75): These intersection fairings are reported to be much higher quality and easier to install than the standard Van's ones. To be honest it was sort of an impulse purchase, "all the cool kids were doing it" so I said it's 75 bucks why the heck not.
  • Door modifications (delete $75, add $1300 = +$1225): This one is a whopper for sure. But, there are a number of improvements here to what many say is one of the best modifications to make. The 3rd latch system provides an insurance policy against accidental improper latching of the door. With the standard door, it is possible to only partially latch the door shut, and unknowingly attempt to take off with the door half open. Upon takeoff, there is enough flex and load for the door to rip off the airplane and potentially cause a very bad accident. A number of doors have flown off over the years in this way, and thankfully no accidents have occurred from them. This improved latch system ensures this won't happen, and also adds a few nice things like flush (and lockable) handles, stronger lift support, and nice-looking trim on the inside.
  • Window replacement with Cee Bailey (delete $730 between fuse&finish kits, add $1500 = +$770): Ok, this one I'm kind of starting to get a bit of buyer's remorse on. I became convinced with Cee Bailey's sales pitch on the better fit and ease of installation when compared to Van's windows. Other builder agree these are nicer windows and they are easier to install, but I'm not 100% sure I can justify the more-than-double price tag. Oh well, I made that decision early this year with the fuse kit order and I'm going to stick with it. I'm sure they will be nice, and who knows, once I actually get them installed maybe I'll be able to appreciate the difference a bit more.
That's basically it for "Finish Kit Stuff" for now. If you have any comments or questions on what I did with my order modifications above, feel free to shoot me a message or leave a comment and I'll get back to you as soon as I can! I also may come back and update the above with some commentary once I actually get the stuff put together.

Tuesday, October 27, 2015

Finish Kit Inventory

We got started on inventorying the finish kit tonight. Typically we start by checking off all the big stuff and finish up with sorting/storing all the hardware bags. This time however, we decided to do things the other way around and start with the hardware bags. There are significantly fewer bags that came with this kit than in, say, the fuselage kit. At first, we assumed that this meant we could breeze through all the bags in little time, but it turns out there is much more assortment this time, and Van's decided to put many deceptively similar-looking parts in the same bags that must be carefully sifted through and separated. They've been known to do this from time to time in previous kits, but I feel like this kit has some of the most egregious instances of this practice. As it turns out, Sarah has "the right stuff" when it comes to distinguishing minute differences between things, or finding a tiny part masked by its background. Ever drop a tiny screw or earring in the carpet and fear that it's gone forever? Sarah can find it with the naked eye in under 10 seconds. She's also crazy good at traffic spotting in the air, by the way.

Sorting through a bag of washers that contained eight different kinds of deceptively-similar looking sizes.

Sorting through a bag of screws that contained six different yet similar lengths and widths.

I did all the easy stuff.

We got through most of the rivet, screw, bolt, nut, washer, and cotter pin bags, and realized we need more hardware storage. We'll need to go back to Harbor Freight and grab a few more of our favorite hardware trays (visible on the right side of the first pic above) and finish inventorying the hardware bags. Then it shouldn't be too big of a task inventorying the rest of the parts... after that it's going to be back to the fuselage!


Monday, October 26, 2015

Finish Kit Delivered!

It's here! Our fourth and final RV-10 kit from Van's has arrived :-) Unfortunately Sarah was stuck at work but my friends Derek and Brannen were able to stop over for a few minutes mid-day to help unload the truck and push the crate up the driveway. This crate was actually a bit smaller than I had thought it would be, and also quite a bit lighter. For some reason Van's keeps changing freight carriers; I've had ABF for the emp and wing kits, Road Runner for the fuse, and now Old Dominion. The guy was nice and the crate was undamaged, but this was by far the most expensive shipping cost, at almost $500 compared to the typical $200-$350 or so. Oh well, write the check and move on I guess. Nothing I can really do about that unless I want to haul it back from Oregon myself.

The Old Dominion delivery truck

Crate in its unhatched form - no damage!

Popped the lid off to have a quick look at the contents before getting back to work... nicely packed as always!

After work, we sifted through the crate to throw away all the packing paper and styrofoam, revealing a handful of sub-kits, a cardboard box containing the front seat frames and foam cushions, and an intimidating number of fiberglass parts. The cowl, spinner, wheel pants, fairings, doors and more are all fiberglass. We're going to need to get up to speed quick on our fiberglassing skills. I have a feeling this winter is going to be full of fiberglassing fun!

So currently, everything is unpacked but not inventoried, and the wooden crate has been broken down and tossed in the back of the truck, ready for another run to the landfill. This week is going to be tough to find time to inventory with Halloween coming up and a number of other family obligations, along with Sarah's brainchild event this Thursday "Trunk or Treat" at the Marion Airport C17. Should be fun though, and I'm sure we'll sneak some time in between everything else to get some more work on the garage in. Stay tuned for that!