Monday, July 6, 2015

Fuse Bottom Skins - Fuse Side Skins Begin

Started another marathon part of the build tonight: the 22-page long Section 29 - Fuse Side Skins! Didn't get too terribly far though, really just maybe about halfway through the first page of the plans. The first several pages appear to be pretty heavy on metalworking, including bending some longerons into shape from raw aluminum angle pieces, as well as rolling some skins into the desired shapes. Other than some pretty minor bending/rolling that occurred during tailcone construction last year, this will be basically the first time we do these types of activities, and there will certainly be a learning curve here to figure out how to make these bends correctly.

The first part of this section involves bending the F-1046-L/R longerons to match the curve of a template provided in the kit. The idea is to put the aluminum angle into a vise, preload it with one hand and strike it with a rubber mallet with the other hand. Doing this many times along the length of the longeron is supposed to create a smooth bend that should match the curve of the template. It took some practice to get the forces correct and figure out which areas needed more or less bending to get it to match, but by the end of this process I think I have a method figured out. I'll probably want to go back to the F-1046-R longeron (the first of the two that I worked on) and give it a once-over again... it's close to correct but I think I can do better. It's a somewhat tedious process that requires a lot of patience!

Sarah had some free time tonight too, so we were able to get started on riveting the parts of the bottom skins that required two people. In order to reach the top side of the rivets with the back-riveting gun, she had to climb into the airplane, which in itself is a pretty cool milestone. This made for really the only photo-op of the evening:

The first human to sit inside the fuselage!

After a quick session of back-riveting, we got about halfway through them all. We started with the most difficult-to-reach ones though, so hopefully the second half goes smoothly tomorrow (or whenever we can get back to it).

That's pretty much it for today, didn't get too far with Section 29 yet but I'm sure that will change in the coming days. Also can't wait for OSH15!

Sunday, July 5, 2015

Fwd Fuselage Assembly

Day 3 of our 3-day weekend build marathon! At this point in Section 28, the plans have you shift gears rather abruptly from riveting to fabrication of some new parts that won't even be used for the time being. The first of these two mini-fabrication sessions was to create two Seat Floor Assemblies from 3 different parts: Two of these parts are pre-punched aluminum sheet, while the third needs to be made from 1/16" aluminum angle.

The two Seat Floor Angles, 3/4" x 3/4" x 17-29/32" with a centerline drawn on one side

L/R Seat Floor Assemblies clecoed together for drilling

The process was straightforward and went very quickly. It was nice to be working on a new part, but also a bit difficult because the fuselage was sitting on two of my three workbenches that I typically use for these types of tasks. It will be nice once this section is complete and we can move the fuselage onto its own wheels (a yet-to-be-built castering wheel stand). We made it work though!

Once the Seat Floor Assemblies were prepped and shot with a quick coat of primer, it was time to move on to the second of two sub-chapters of this section: building the Mid-Seat Rail Supports. Again, this is a very simple, straightforward task that really can be completed at any time unrelated to any other part of the build thus far. Also, I might add that they are both great projects for new builders who may want to know what it's like to build an airplane and learn how to acquire some of the basic skills needed.

The Mid-Seat Rail Supports after drilling and countersinking

While the primer was drying on the supports, I could begin assembling and riveting the seat floor assemblies that had just dried enough to work on. A few dozen rivets and nutplates later, we had this set of completed assemblies:

L/R Seat Floor Assemblies, complete (top)

L/R Seat Floor Assemblies, complete (bottom)

By the time these were done, the primer had dried on the seat rail supports, so they could be riveted together as well:

L/R Mid Seat Rail Supports

That was a fun break from the current state of affairs with the main structure of the fuselage! Plus, it means we're almost done with section 28... the only thing left to do now is temporarily install the landing gear mounts (for the second and final time before they are installed for good) and match-drill them in a few locations. After making some measurements and markings, I installed them into position using the 5 bolts called out in the plans, and final-drilled 2x #12 holes in the forward brace.

Forward brace of the landing gear prior to match-drilling

The next thing to do was fetch the Fwd Side Skins and install them temporarily to use as a drill guide for the side of the landing gear mounts. This was kind of cool, because we got a sneak peek as to what the fuse looks like with the side skins on:

Fwd Fuse Side skin temporarily installed, R side

Inside of forward fuselage, L side skin temporary installation

That's pretty much it for now! After this, the landing gear mounts came back off again for more deburring, and we're now basically finished with Section 28 except for riveting some parts of the bottom skin. We'll get to that early on this coming week I'm sure! With any luck, we'll be through all the side skins before we head to Airventure 2015 in less than two weeks.... we're both getting very excited for that!


Saturday, July 4, 2015

Fwd/Mid Fuselage Join

Got up early this morning to get right back to building! I knew today was going to be exciting because the first thing to do was to attach the Fwd Center Section Bulkhead and then mate the forward and mid fuselage sections together, making one continuous piece of the fuselage! Took many photos of this ceremonious occasion:

Fwd and Mid Fuse sections prior to joining, looking aft

Fwd and Mid Fuse sections prior to joining, R side

Fwd Center Section Bulkhead, inside view

Aft Center Section Bulkhead, inside view

After a bit of finagling with the wing attach bolts and spacer plates, I got both halves lined up, skins layered appropriately and everything bolted into place:


Fwd and Mid Fuse halves mated together!

Fuselage is starting to have some real mass to it now!

It was really cool to see these parts come together and form a quite significant part of the fuselage. Lots more to go still, of course, but this was definitely a moment worth relishing.

Next on the list was to begin riveting everything together. I'll need Sarah's help for a lot of it, but she's busy packing for OSH15 (I can't fault her for that, haha) so it's just me in the factory today. I was able to do the double-flush rivets that join the Fwd and Mid Bottom Skins to the Fwd Center Section bottom flange and go beneath the landing gear mounts though. I had been worried about these rivets, because double-flush is always a bit tricky and I wasn't 100% sure I had countersunk them properly on both sides. I was relieved to see that all 14 (both sides) turned out well and I guess I was worried about nothing. Better than the opposite I guess!

Double-flush rivets to go under the landing gear mounts

We'll leave the rest of the bottom skin rivets for a later time, it seems we can carry on with the plans with them just clecoed into place for now. In the meantime, I finished up bolting the Fwd Fuse bulkhead together and riveting the remaining ribs to their respective bulkheads. The only other thing left for now is the bottom firewall flanges, I'm going to save those until I have some firewall sealant (at this point I think I'll be using 3M Fire Barrier 2000+ but I haven't ordered anything yet). Again, these rivets are in a location that will be accessible anytime, so there is no rush to do them right away.

With that, we are through Section 28-14 step 11, and we have a fuselage that is coming together nicely! The next steps appear to be some minor fabrication work to make the seat floor assemblies, followed by a second trial-fitting of the landing gear mounts for more match-drilling.

This afternoon we're off to a friend's house for a 4th of July celebration, so that's it for now. Happy Independence Day!


Friday, July 3, 2015

Firewall - Fwd Fuse Ribs

Happy 4th of July and 3-day weekend! Other than taking care of some quick things at work this morning, it was a long day heads-down in the shop bucking away on a few hundred rivets! Yesterday, I was able to get some time over the lunch hour to prime all the parts we had completed on Wednesday, so I was able to start off today finishing the firewall assembly. This first involved riveting the nose gear tension brackets to the forward fuse ribs, which went pretty smoothly but took some time just because of the number of rivets.

L Fwd Fuse rib and nose gear tension fitting

L Fwd Fuse Rib subassembly, prior to firewall attachment


Once the L and R subassemblies were together, it was time to attach them to the firewall, making the complete firewall assembly as laid out in Section 28 of the plans! Lots of photos to follow:

Firewall assembly, R aft side

Firewall assembly, aft side

Firewall assembly, L aft side


Firewall assembly, front side


Once this assembly was finished, it became possible to start assembling the entire Fwd Fuse section, including the Fwd Bottom Skin and floor stiffeners. The majority of these parts could be back-riveted using the embedded backing plate I have in one of my worktables, which makes for quick and consistent work and almost guarantees clean-looking rivets in the finished product. The only thing that made it (only slightly) more difficult was that Van's seemed to accidentally omit the rivet size callouts in the diagram... thanks!!

The legend in this section of the plans showing the rivet callouts... missing 3 of the 4 sizes... oops!

Early on in the "empennage days" this would have almost certainly meant a phone call to Van's, if only to double-check. However, now that we're this far along with the airplane it wasn't that big of a deal at all, and we knew just what size of rivets belong in each place based on the materials being used (also, to be fair the symbols tend to be consistent--but not always--for the rivet sizes). For anyone interested, from top-to-bottom the sizes go AN426AD3-5 (shown), AN426AD3-4.5, AN426AD3-4, and AN426AD3-3.5.

Fwd Bottom Skin with floor stiffeners installed, L side

Fwd Bottom Skin with floor stiffeners installed, R side


With the rivet-size-conundrum and back-riveting session behind us, it was time to join this bottom skin assembly to the firewall assembly with a few more rows of rivets. These were a bit more difficult to back-rivet because it was hard to get a particular row to sit perfectly flat on the riveting plate. I ended up attempting to do this but a number of the rivets didn't set properly and ended up sitting proud. This made for a mildly frustrating drill-out session (maybe 10 rivets) followed by re-doing them using the two-person back-rivet method (Sarah had gotten home from work by this point), similar to how the wing top skins were done.

Firewall and bottom skin riveted together

Firewall and bottom skin riveted together, R side

Firewall and bottom skin riveted together, L side

At this point, we are ready to install the center section bulkheads and mate the Fwd and Mid fuselage sections together... but it's getting late and this is most certainly enough progress for one day! Hopefully we can keep this pace up over the rest of the weekend!


Wednesday, July 1, 2015

Fwd Fuse Ribs - Fuse Bottom Skin

Not much to report from today except we finished deburring and dimpling tonight! Started off completing all the edge-finishing work that we started yesterday, and then busted out the MikeyJ-2000 dimpler for some dimpling of the bottom skin, floor pans (#30), and fwd fuse ribs in a couple spots that hadn't yet been done. Then, using the hand squeezer we finished dimpling all the smaller bits like the floor ribs. We're at the point now where we can finish up the firewall subassembly and begin putting the fwd fuselage together at the same time.

Hopefully over lunch tomorrow I'll be able to sneak in a quick priming session and then we'll be ready to kick off this 3-day holiday weekend with some serious riveting. Exciting times, stay tuned!

Tuesday, June 30, 2015

Fwd Fuse Ribs - Fwd Bottom Skin

Major deburring session tonight, making Van's wishes a reality as set forth in Section 28 page 10. I deburred and countersunk holes while Sarah was on edge-finishing detail. I got through just about all holes in all parts, and she got through maybe about half the parts' edges. That's not because I'm faster than Sarah, by the way... her job just takes longer! The only thing we're holding off on for the time being is the three brackets that go in the tunnel for the fuel filter, pump, and flow meter just in case we put those items elsewhere. At this point I'm thinking we might do two individual filters (one for each tank) and put them under the seats. We'll see... these are details that can be delayed for quite a long time, and we can still go back to the original design at any point since these areas will always be accessible.

Other than that, no visible progress so it's another photo-less day. Next time, if we're lucky and get to the priming stage, we might finally snap a photo or two to share!

Monday, June 29, 2015

Fwd/Mid Fuse Sections

Mated the Forward and Mid Fuselage assemblies tonight for the first time! This step is necessary to final-drill the bottom skins and side plates, which overlap between the two center section bulkheads. It was a bit clumsy aligning the two large assemblies to the point where you could slide these close-tolerance bolts through the two center section bulkheads and 14 spacers (per location), but eventually we got them all into place. Final-drilling the skins went quickly and easily, although of course you're doing it nestled between two tables and underneath the fuselage assembly. Once that was done, and the center section side plates were final-drilled, the whole works starts to come back apart. Not just the forward and mid sections, but all the parts that have not yet been riveted all come back to their individual pieces and stack up into a giant pile of parts ready for deburring.

Like a dummy, I didn't take any pics of the fuselage halves bolted together, I think I was "in the zone" for drilling and making some real progress after a pretty dismal couple weeks. It's ok, it will be bolted together again soon once all these parts are ready for final-assembly.

That's it for now, tomorrow if everything goes well at work I should hopefully be able to have a full night in the factory for a major deburring session... fingers crossed!

Thursday, June 25, 2015

Fwd Fuse Ribs - Fwd Cabin Floor Panel

Just a mini-session tonight, final-drilling the forward cabin floor panels and pulling them back off the floor ribs. The floor pans have now been added to a growing pile of parts that are final-drilled but not yet deburred, dimpled, countersunk, or whatever other prep-work is needed before priming and final assembly.

It looks like the next step will be to join the forward and mid sections together-- albeit only temporarily-- which is still an exciting prospect! No time to do that tonight, but we did at least dig out the wing attach hardware and 56 spacers needed to do the job. Unfortunately it might not be until next week that we get around to working on this any more, we have a big weekend coming up putting in some extra time at work and then Sunday is our big annual fly-in/drive-in breakfast at C17, where I'll be helping to cook eggs, pancakes, and sausage for what's expected to be over a thousand guests. Fun times for sure, but I'll be looking forward to getting back to fuselage as soon as we can!

Wednesday, June 24, 2015

Forward Fuse Ribs & Bottom Skin

Back in the shop after almost a week off from building! My parents had been visiting from Buffalo, NY over the Father's Day weekend, and although we did get a chance to do a number of aviation-related activities-- including a fly-in BBQ and an attempt at participating in a YE event (cancelled due to marginal weather)-- we actually didn't spend much time in the factory other than showing off our progress so far. Maybe next time they visit I'll try a bit harder to put them to work... or take them for a ride in it, whichever is possible at the time :-)

Anyway, tonight wasn't a night of crazy progress or ground-breaking discoveries, but early on I did catch a mistake I had made while riveting together the firewall. This leads me to my second "GOTCHA" installment: The mystery of the "empty" lower 16 holes on the firewall!

Rivet Diagram on pg. 27-5, holes in question circled in red

The rivet callout diagram on Page 27-5 is misleading, in my opinion (I even pondered what they were for in my entry from 6/11). It shows AN426AD4-4 rivets should be installed into these 16 holes, and they are not included in the markings that say "do not rivet when creating subassembly..." Furthermore, elsewhere in the plans it calls out to dimple all holes, and install 4-4 flush rivets into any unused holes. My conclusion? These holes won't be used and they should be dimpled and filled with 4-4 rivets.

So what are these holes for? It didn't become clear until page 28-7 step 1, where they have you final-drill #30 the holes between the firewall and the Fwd Fuse Floor Ribs. Hey, guess what? They are referring to those 16 holes for the first time ever in the plans... and they really shouldn't be dimpled at this point, or at the very least they shouldn't have rivets installed into them! Aarrgh. Carefully drilled out 16 perfectly-installed 4-4 flush rivets. Not the greatest "first" task after getting back to the project after a week off from building, but hey what can you do. It actually went pretty easy, no holes damaged and we were back to good in short order.

My suggestion if I were to do this again? (1) Do not drill, deburr, dimple, or rivet these 16 holes while constructing the firewall assembly in section 27, leave them completely alone. (2) Final-drill per instructions on 28-7 step 1. (3) Deburr and dimple these holes in the firewall after everything comes back apart on page 28-10.

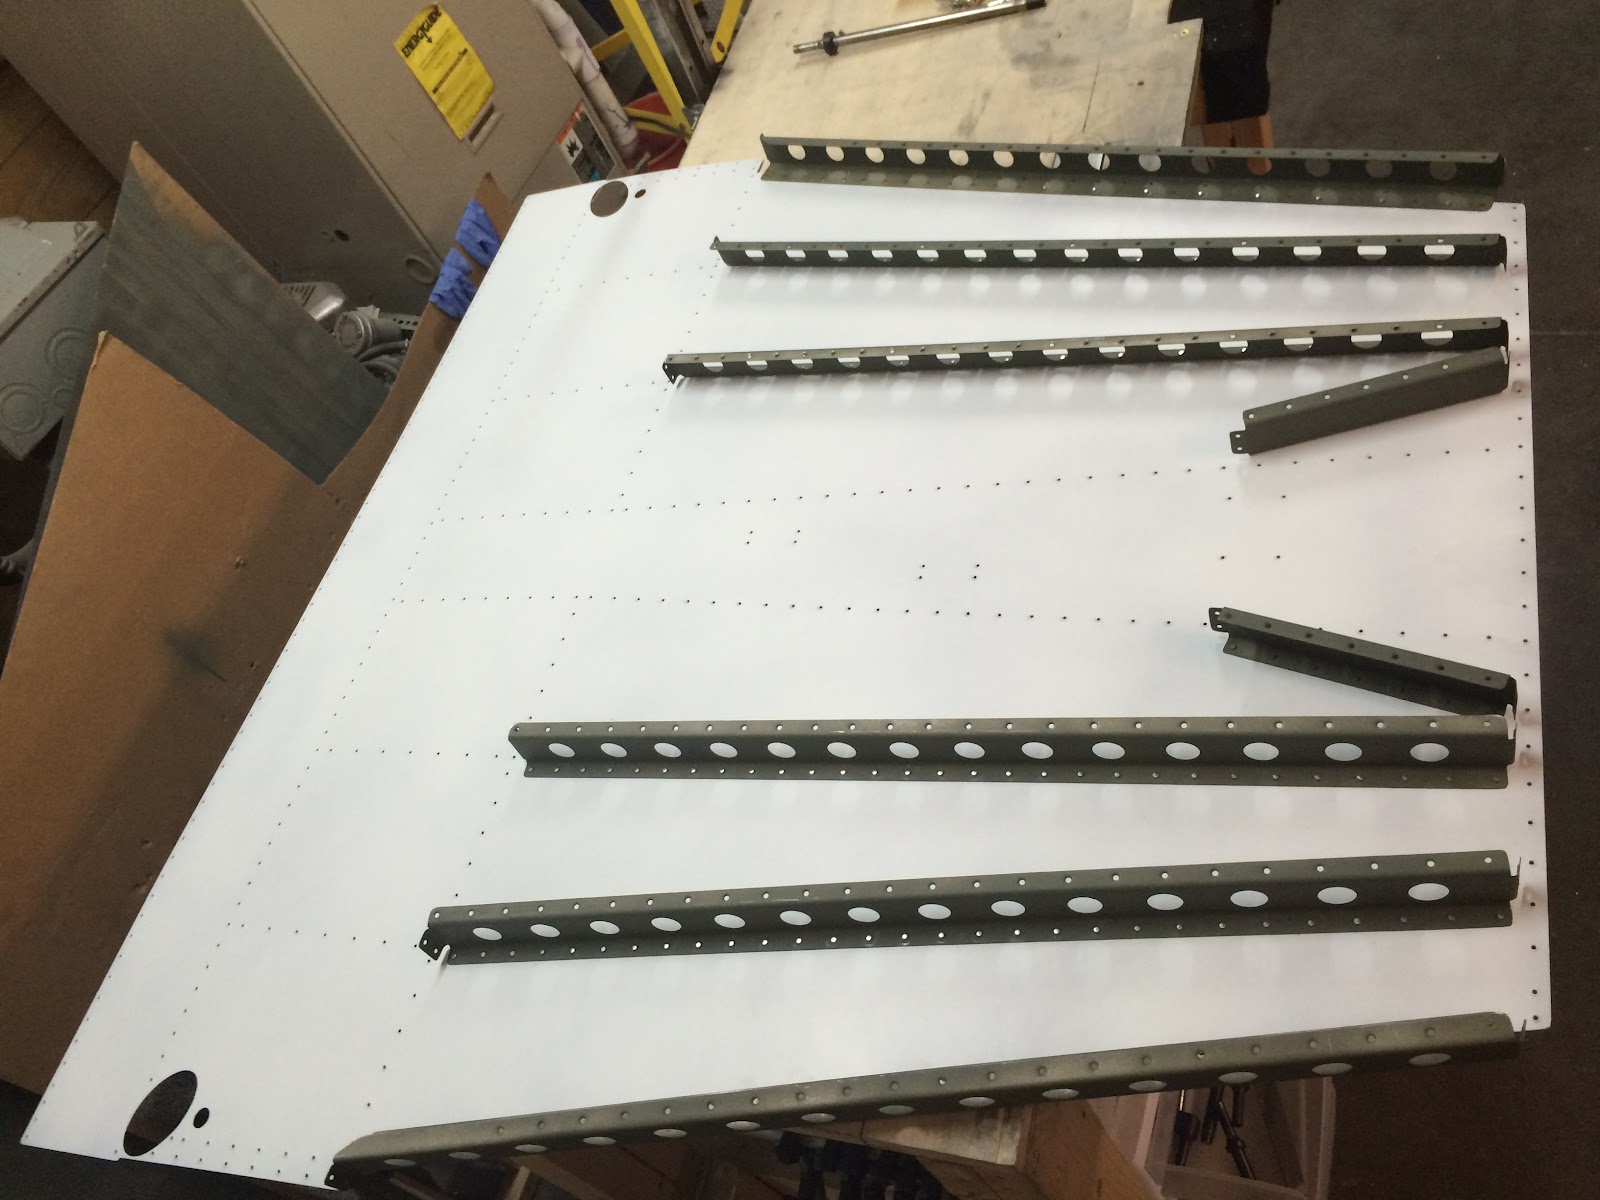
Side view of the lower firewall after drilling out the rivets in question and drilling/dimpling the mating flanges on the floor stiffeners.

Anyway, other than this ordeal, all we really got done was some more final-drilling of the bottom skin and installation of the Fwd Cabin Floor Panels, which was kind of cool ("This is where our feet will go!"). Here's a pic of the current state of affairs:

R forward floor panel, looking towards firewall

R forward floor panel, looking towards rear

That's pretty much it for tonight! As soon as these floor panels get final-drilled and a bit more prepwork and deburring, looks like we'll be mating the forward and mid fuselage sections for the first time ever... excited for that to come!


Wednesday, June 17, 2015

Fwd Fuse Ribs & Bottom Skin

More good progress on the forward fuse section tonight! Picked up where we left off yesterday and finished up match-drilling the F-1043 Fwd Fuse Bulkhead parts and control column mount, then taking everything back apart for deburring. The next steps then involve all-new parts, this time for the bottom skin and floor stiffeners. Took a few minutes to ensure proper orientation by squinting at the plans and making sure we were doing as instructed, ending up with this:

Fwd Fuse Bottom Skin and floor stiffeners clecoed together

Side view of forward bottom skin

Next step was to flip the assembly over and match-drill the 8 stiffeners and 3 brackets to the skins. Next we clecoed the firewall assembly and parts of the F-1043 bulkhead to the skin. Since the firewall assembly is still not 100% complete, there are a number of clecoes holding it together, which should be fine for now. I'm going to try to delay riveting it together for as long as possible to figure out what we're going to do with the center console and tunnel area. Speaking of which, the breaker panel came today!

N407ND's circuit breaker panel

It looks about exactly as I had imagined, and we'll see what we can do with this. Not yet though. In the meantime, lots more clecoing and final-drilling all the forward fuselage parts. It's coming together though!!!

Forward bottom skin with firewall and fwd bulkhead clecoed together-- it's starting to look like a proper "front office"!

R side view of the forward fuse assembly

L side view of the forward fuse assembly

Happy Mikey J!

That's pretty much it for tonight... maybe no more building until the weekend due to some plans to clean up around the house and get ready for my parents who are visiting over this father's day weekend. We'll see if I can convince them to do a rivet or two!