Showing posts with label Wings. Show all posts

Tuesday, September 29, 2015

Baggage Door - EAA Tech Counselor Visit #3

One step closer to finishing the baggage door! Tonight I fabricated and installed a stiffening plate across the baggage door frame where I had cut it to fit the latch. I'm pleased to say it added the exact stiffness I was hoping it would, and now the only thing left to do is find and install a mini strut to hold the door open and prevent it from opening too far.

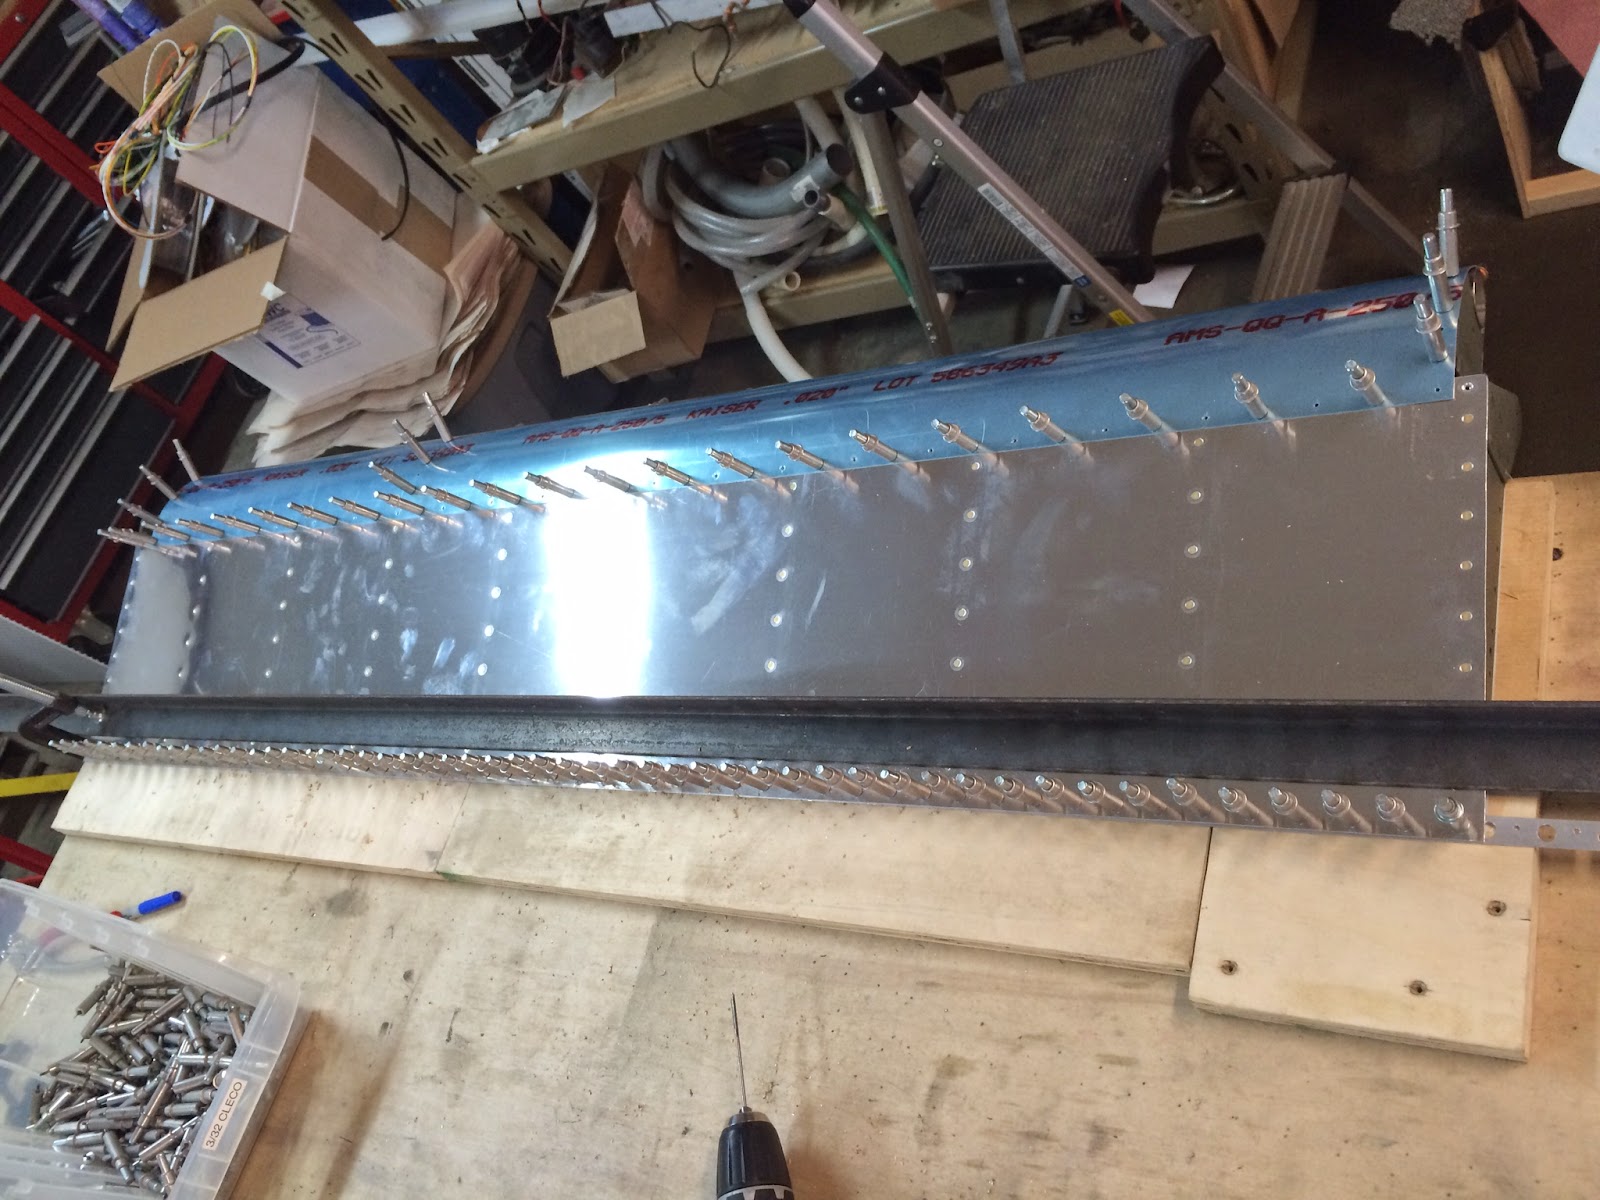
The stiffening plate connecting the two halves of the baggage door

As for the strut, I believe I've found the correct part for that from McMaster-Carr, P/N 9417K6, a "Miniature Gas Spring" with travel from 5.55" - 9.05" and 20lb force (edit- see later post here, recommend 5lb force instead), combined with P/N 9417K92, the accompanying mount bracket (edit- this bracket is too big and bulky, just make your own out of aluminum angle). The parts are on their way, and I'm hoping they work out nicely. After that is installed, we're just a few blind rivets away from calling the baggage door 100% complete!

In other news, our EAA Tech Counselor came by tonight for a visit to see the project. This is technically his third time here in the shop, but the first time was before we even set our first rivet on the empennage kit, just to look over our shop and tools, and to make sure we were on the right track. The second visit was after we had completed the elevators but hadn't yet started on the tailcone. Unfortunately, during those previous visits we never completed any official EAA paperwork to document the inspections (other than logging it ourselves). No big deal but in hindsight it would have been nice to have done it just to cross t's and dot i's. This time, though, we got our yellow slip:

EAA Tech Counselor Notes

He did an extremely thorough job inspecting the wings and fuselage, and I'm happy to say that overall he had some very positive feedback for us. He even noted "excellent workmanship overall" in the comments.... wahoo! Talk about how to brighten someone's day. It felt incredibly rewarding to have an expert in E-AB aircraft (and an RV-6 builder/owner himself) look over our work and give it the thumbs-up. The only thing he noticed was on the aileron torque tubes, the nuts holding the tubes to the bearings didn't have enough thread showing. The FAA rule is that there must be at least 2 threads showing beyond the nut, and on our wings that didn't work out to be the case:

The aileron torque tubes with AN365 locknut and washer, and only ~1 thread sticking out the top

I was already aware of the "2-thread" rule, but admittedly I guess I thought it was more of a guideline and not a hard-fast rule. Also, I thought I had the hardware installed per the plans, so "it must be right." Plus, the way the whole tube is in there, there's no way it's coming out even if the nut were to fall of entirely somehow. So at first it seemed like kind of a trivial finding, but since it's an FAA rule and will surely be looked at by the DAR when they come to inspect the plane for airworthiness, this could end up costing us a fair amount of time (likely several weeks) if they ding us for it and make us fix it, then we'd have to perform the fix and reschedule a time for another inspection. Way better to remedy this now!

So how did this happen in the first place? Well, we got out the plans for the wing and turned to Section 23 (aileron actuation) and reviewed the hardware callouts. Guess what? We goofed. They call for an AN364 (which is a low-profile version of the more common AN365) locknut to be installed in this location... oops!

The hardware callouts in the plans, Section 23-7, Figure 1

Simple oversight on my part in the callouts. Definitely a good catch, and lesson learned! I'll have to dig up the correct hardware (couldn't find any AN364 nuts in my hardware bins) and swap them into place, should be a very straightforward fix.

Other than that one finding, everything else went very well during the inspection! We then spent a long time discussing all kinds of things from avionics to flight characteristics, and all the different aircraft he's seen over the years. I can't possibly stress how thankful I am that a program like EAA's Tech Counselor program exists, and even more so for the individual counselors who volunteer their time to help others like us get through their build in a correct and safe manner. Thanks Tom! :-)


Sunday, June 7, 2015

Aileron Actuation - Fuse Bottom Skins

Got another "to-do" checked off on the wing section today... yay! Finished the Aileron Actuation section today, which was a pretty cool section to work on. Previously, we had already created a few pushrods and bellcranks but not the torque tube assemblies, so it was time to get started on that:

Clocking/assembling the aileron torque tube assemblies - 5/16" offset and 17-3/4" total length (+1/32" acceptable)

One of the brackets needs to have a 5/16" clocking with respect to the other, as written in the plans. I decided to use a 5/16" drill bit (shown above) as my reference for clocking since it has a very precise "known" size. It went pretty smoothly and before I knew it I had two mirror-image torque tube assemblies. Now to prime and install on the wings. Installing them between the two torque tube bearings was actually was trickier than I thought it would be; there really isn't much room to work the pieces around, and the fact that the pieces have now been primed means they are even more reluctant to slip into one another. Eventually though, I prevailed and ended up with these torque tube assemblies installed:

R Aileron Torque Tube assembly

L Aileron Torque Tube assembly


With these installed, it was time to put the rest of the works together! This was exciting, because when complete you can push/pull on the levers here on the torque tube, and see the ailerons go up and down, way over on the other side of the wing... like magic! So, a few bolts/nuts/washers later, I had the following assembly together:

Torque tube -to- pushrod joint

Aileron bellcrank assembly with two pushrods

By golly it works! Awesome. Played with the ailerons, moving them back and forth for a longer period of time than someone my age ought to have. Oh well, no one was watching. We'll still need to final-rig these bearings at a later time for all the correct tolerances once everything is together, but they certainly appear close to the recommended clockings and everything moves smoothly and precisely! Very cool, couldn't be happier.

After Sarah got back from her afternoon plans (which included tearing up the skies over Marion in a C150, I might add), we got back to back-riveting the fuselage bottom skins. It's a fun process but gets pretty tedious after a few hundred rivets. We persevered through it all though, and I'm pleased to say that all back-rivetable rivets are now back-riveted! There's still a few dozen here and there that we skipped over to get later via the traditional flush-riveting method. Maybe tomorrow we'll get to that. No pics of the fuse in its current state yet, we're saving the "reveal" for when we get those last rivets done... hopefully tomorrow!


Sunday, May 31, 2015

Mid Fuse Bulkheads - Fuel Tanks - Mid Fuse Ribs

Tons of progress yesterday, and today too! Picked up right where we left off last night and finished riveting the F-1004B Mid Fuse Bulkhead:

The completed F-1004B Bulkhead

F-1004B right side closeup - 30 rivet holes and 8 bolts on this piece, with a vertical line left open for now to accept ribs later on.

F-1004B left side, mirror of right

Two down, two to go! Next up was the F-1005 Bulkhead. This part was pretty straightforward to assemble, the only tricky thing being to take note of all the rivets to be left open for now to accept other parts later on.

F-1005 assembled, with a number of rivets left open per plans

View of left side of F-1005

Lastly, time to assemble the F-1034 Bulkhead. With only 24 rivets, it was done pretty quickly:

F-1034 Bulkhead complete!

Once the four bulkheads were assembled, it was time for "family" photo of the four of them stacked up:
All four bulkheads done!

This was exciting... we completed the first chapter of the fuselage without really breaking much of a sweat! TONS more to do, of course, but this was a great start...

With that, it was time to shift focus temporarily back to the wings, and re-test both tanks for leaks. Both tanks tested perfectly!

L tank holding steady 1 psi

While each tank was on the pressure test bench, I masked off the attachment flange and gave it a quick shot of primer to attach the VA-146 bearing and nutplate shims (from back in Section 18-5 Step 5). This completes the fuel tank section now too... woo! So, why not grab a few screws and bolts and attach them to the wings?

Fuel tanks attached - the wings look huge with everything bolted on!

Wings complete, minus wiring (80% done), bottom skins (40% done), and actuation (50% done)

Exciting! With that, we were able to get just a little jump start on the next chapter of the fuselage, Section 26 - Mid Fuse Ribs & Bottom Skins. This looks like a pretty big chapter, so I doubt it will be done in 3 days like the last one. Either way, here's the first few parts laid out:

The F-1016F-L/R inboard seat rib subassemblies coming together

These subassemblies go along the "tunnel" between the front and backseats, and have parts in them for front seatbelts and rear floor ventilation. Just a little final drilling and deburring, and it was time to call it a night. Awesome weekend of building, hope we can keep this up!!


Wednesday, May 27, 2015

Flaps complete!

Crossing items off the "partially complete" list is going swimmingly... tonight we finished the flaps! It went just about as well as the ailerons did on Monday, just a bit longer of course and a few more rivets to contend with. It feels good to be done with trailing edges, they are always such a tedious pain in the you-know-what. Now that all four control surfaces are complete, it was time to bolt it all up to the wing, stand back and take a picture!

L flap, inboard side

L aileron, outboard side

R aileron on left, L aileron on right

I've got some aluminum C-channel that I'll be clamping on to each of the 4 edges for a day or two each, to help them become completely straight while the proseal cures fully. It's still in that perfect state where it's cured, but still cleans off easy enough with acetone, and can be influenced by things like this clamping device. Hopefully when all is said and done, we'll have four perfectly straight and well-aligned control surfaces!


Monday, May 25, 2015

Flaps - Ailerons Complete!

Happy Memorial Day! Today was a work holiday for me, but unfortunately Sarah had to go to work at the airport. So, in an unprecedented and incredibly bold move, I decided to break out the proseal myself and do a round of it solo. All things considered, it actually went pretty well, and somehow I didn't make a giant mess. Sarah would be proud.

I started the solo proseal adventure by gooping up both flap trailing edges and clecoing the assemblies together. I had just enough remaining to attempt to patch up the part of the L fuel tank that appears to be the only place that had a leak. We'll have to let all this cure and retest.

Next, it was time to rivet the aileron trailing edges together, that had been setting up since Saturday. That also went pretty uneventfully, and in short order both ailerons were complete! Yay, something we can check off the "partially complete" list as now "done"!

Not much else to report today, and tomorrow we'll be going to a fly-in BBQ at KIIB. Hoping to get the flaps and fuel tanks completely done sometime this week, then it's on to the fuselage!

Sunday, May 24, 2015

Aileron Actuation

Since we're simultaneously working on a few sections, why not start on yet another? Can't think of one good reason! :-)

While we're waiting for proseal to cure, we skipped ahead to section 23 to start on the aileron actuation section. This part of the plans involves constructing a series of pushrods, bellcranks, bearings and torque tubes that will translate pilot input to movement of the ailerons.

No pictures today either (I think we're getting lazy with the camera... need to change that) but basically we got through page 23-4 step 2, which means the four pushrods have been fabricated, as well as the outboard bellcrank installed. Still need to build the forward and aft torque tube assemblies, and clock everything together. We'll work this in as time permits, no huge rush on completing this section either.

That's about it for today, it was a relatively short day in the shop! Tomorrow if we're feeling crazy we might try and knock out the flap trailing edges and bottom skins, and see about patching the one small leak in the L tank.

Saturday, May 23, 2015

Flaps - Ailerons - Fuel Tanks

Things are getting pretty hectic in the factory over this long weekend. I feel like we're simultaneously working on 3 or 4 sections at the same time, and all of them are only "half" done. We're halfway through the wing bottom skins but on hold to go any further until we're ready to seal up the wing, we're halfway through with the flaps, we're mostly through the ailerons (except trailing edge), we're mostly done with the tanks but still need to pressure test them... time to move some of these to "complete" status!

Not today, unfortunately. However, we did make leaps and bounds of progress towards this goal. Started this morning with riveting the L and R flap leading edge and top skins to the skeletons. We again installed the flaps onto the wings to check for straightness. They are much more rigid now but can still be influenced one way or the other, albeit only slightly. Still looking straight, which is great news! Then we took them back off the wings and started installing the bottom skins. The flaps are now to the same point as both ailerons: Complete except for trailing edge, and perhaps a few blind rivets that need to wait until the trailing edge is assembled.

With talk of the trailing edges comes talk of Proseal. With talk of Proseal, of course, comes talk of our fuel tanks, namely the goof-up we did with the R tank attach zees being all backwards. So, with the sealant all fully cured it was time to bust out the drill and attempt to carefully remove the seven zees and extract all the rivet tails from the tank. Surprisingly, drilling them out was quite easy (finally, something seemed to go right)! I was also able to fish out about 2/3 of the rivet tails with little issue. The rest of them are still floating around in there for now, but I think the best bet is to try to rinse them out once the tank is sealed up again. We'll keep count, and make sure we get them all.

With the R tank zees removed, cleaned up, and oriented properly, we mixed up a batch of proseal to do the aileron trailing edges and re-attach the zees in the correct order. Happy to say that both efforts seemed to go quite well, and now all that's left to do proseal-wise is the flap trailing edges.

Last thing for the day, it was the "moment of truth" for the L fuel tank. I had bought some fittings, tubing, and valves a week or so ago to make a pressure testing system to connect to my compressed air supply and pressurize the tanks to around ~1psi. This is a higher pressure than what the proposed balloon method allows, which I've read only pressurizes to around 0.5psi. That comes up a little shy of nominal tank pressures during flight when filled with fuel, so I decided to go with this method.

The results were good overall, I'd say. The tank initially held the 1psi pressure, but over the next 10 minutes I noticed it was definitely dropping slightly. A soapwater spray of the tank's exterior quickly revealed the apparent only leak-- at the outboard-top corner where the end baffle meets the aft baffle. Van's points this area out as a common leak source (all four corners, actually), but this particular corner is a sort of "best case" scenario for leaks, as it is the top-most part of the entire tank and theoretically needs to be the least leakproof, so to speak. From the looks of it, we should just be able to goop a bit more proseal on that corner and it should resolve the issue. We'll see if it's that simple... fingers crossed!

Now we wait for some proseal to cure... maybe tomorrow we'll get started on Section 23 - Aileron Actuation! That would be cool, because it's the last chapter of the wing kit! (Except tips, which we're putting off for now...)

Stay tuned!

Thursday, May 21, 2015

Fuselage Inventory Continued / Flaps

Finished inventorying the fuselage kit tonight! I believe we did discover one part missing, the F-1059A Baggage Door Forward Frame. I'm sure it's no big deal, the missing part isn't very big at all from the looks of it in the drawings. So far in the build, with 3 kits and thousands of parts (tens of thousands if you're counting rivets) I can handle one little piece being missing. Actually it's still unbelievable to me that they are really this accurate. I'll contact Van's today about it... we're still well within the 30-day window to sort out these kinds of issues. They did get all of my "deletes" perfectly though, so that's a plus!

Speaking of deletes, it seems there is always some interest in questions like "what to delete from the fuse/finish kits and why"... I will try and answer what we decided to do for our fuselage kit here:

1. Windshield and side windows-- replacing with Cee Bailey's windows based on a number of reviews of them versus the stock Van's:
-Delete 1x: C-1005 WINDSHIELD RV-10
-Delete 1x: C-1004-L REAR LEFT WINDOW
-Delete 1x: C-1004-R RIGHT REAR WINDOW
Note: The windows for the doors (and the doors themselves) come in the finish kit. Will be deleting the windows from that kit when the time comes.

2. Heater box-- replace with stainless steel boxes from Plane Innovations. The Van's ones are aluminum that go on a stainless steel firewall, as such they are a weak spot for fire to penetrate.
-Delete 1x: TG-1010 L&R RV-10 HEAT BOXES (2)

3. Fuel valve-- replacing with aftermarket duplex valve (either Andair or Newton SPRL)
-Delete 1x: BAG 487-1 FUEL VALVE RV-10 ONLY

4. Rudder pedals-- replacing with Control Approach rudder pedal system
-Delete 2x: F-1052 RUDDER PEDAL SET
-Delete 4x*: F-1052B BRAKE SIDE PLATE
-Delete 2x: F-1052C BRAKE PDL.DBLER.PLATE
-Delete 1x: WD-1006-L-PC RUDDER PEDAL
-Delete 1x: WD-1006-R-PC RUDDER PEDAL
-Delete 1x: F-6115 CENTER BEARING BUSHING
-Delete 1x: F-8105 BRAKE HOSE 20" 8/10
-Delete 1x: PT-062x1/4x15' HI PRES BRAKE HOSE
-Delete 1x: BAG 1377-1 BRASS FITTINGS/INSERT
-Add 6x: AN822-4D ELBOW 90DEG TUBE-PIPE
*I accidentally only deleted 2, there are actually 4 of these parts.

5. Oil cooler mount-- typically ships with Finish Kit, several builders have commented that it is easier to assemble and install on to the firewall during the fuselage kit. Adding to fuselage order, will be deleting from finish kit order.
-Add 1x: VA-186 OIL COOLER MNT RV-10

Please Note: Our decisions to delete/replace parts were made very carefully, taking into account our mission, goals, aesthetics, ease of build, and most importantly safety. If you are building an RV-10 and reading this list to get ideas on what to delete from your own kit, please use this only as a reference along with doing your own personal research into what options you do and don't want. Van's will send you a waiver when deleting certain parts (such as rudder pedals) warning you about the risks of using nonstandard parts that you must sign and return before they will ship you your kit. Make sure this is something you are comfortable with before making any alterations!

During the inventorying process, I noticed a part or two relating to the stock fuel valve that were still present as a part of other BAG's (handles, spacers, etc), and also I'm not sure if I deleted *all* of the rudder pedal parts. In the end this was the best I could do after discussing with Paul at Control Approach and doing some of my own research through the plans. This list is at least "close" to complete, and I'm happy with the results so far. Of course, the real test will come when we actually start putting this thing together! Until then, we have a semi-organized 4' x 4' x 8' shelving unit chock full of parts:

"Just a few" parts to throw together!

With all that out of the way, it was time to focus back on the flaps. We riveted both the L and R flap skeletons together, which actually went quite well and was a welcome return to building after sorting through all the fuse parts.

R flap skeleton complete, ready to install leading edge skin

View of R flap skeleton at the middle, looking inboard

We clecoed the leading edges and top skins into place, and temporarily installed the flaps back on to the wings to check for straightness (we're paranoid about having twisted flaps). Looking good so far, but it seems quite clear that at this stage the assembly is "vulnerable" to twist. It seems to naturally want to sit straight, but with just a little force it can be twisted in either direction. This was an important observation, and we'll be reinstalling these onto the wings throughout the riveting process until it is rigid enough for us to be confident that we have built them straight.

Looking forward to a weekend of building!!!


Wednesday, May 20, 2015

Fuselage Kit arrival - inventory

The fuselage kit came today! I have to admit, probably like many other builders, this is the kit I've been most excited about getting since the beginning. It's going to be hard to finish the last couple weeks we have on the wings with this kit sitting here, but hey that's the way it goes. We were both able to get a little time off from work in the middle of the day to meet the delivery truck and get our friends Brannen and Mark over here to help push the crate up the driveway and into the garage. It was a pretty cold and rainy day, unusual for mid-May but that didn't get our spirits down one bit!

Somebody is excited!

The fuselage crate, fresh off the truck and totally undamaged, thankfully!

We couldn't resist taking two minutes to pop the top off the crate and get a first glimpse of the canopy! Sarah quickly poked her finger in there to be the first one to touch it :-)

One interesting note: the bill of lading sent with the kit lists the contents of the crate as "plastic parts", which seemed odd because there's hardly any plastic in here at all, unless you're counting the blue shrink wrap on all the aluminum. Anyway the truck driver seemed puzzled and mildly intrigued as to what was really in the crate and asked me what it was for. I told him, and his answer was simply an unmistakable look that told me I must be nuts. This is the third kit crate delivered to my home for this project, and it's the third time I've seen that look from a driver :-)

That was pretty much it until later in the day when we were both off from work and could commence unpacking and inventorying. First step was to break down the rest of the crate and split the contents up into the "subkits" that each kit ships with. A subkit is basically just a shrinkwrapped bunch of parts that are *not* necessarily related, but for some reason (I assume has to do with inventory at the factory) they get grouped together on the parts list that ships with the kit. It also makes it easier to tackle intentorying everything rather than going through a single list of hundreds of items.

Crate broken down, first full glance at all the kit parts!

First selfie inside the cabin! I think we fooled a lot of our friends on Facebook after posting this into thinking we were a lot farther along :-)

This is what we were actually "sitting" inside of

The steps! Had to give'em a whirl. Nothing to climb into yet, but that will hopefully change in a few months!

Even a first glance at the contents clearly told us we were going to need a better method of storing the many hundreds of parts this kit comes with. After looking around the garage for ideas, I grabbed a few 2x2's and 2x4's that we had on hand and got to work on a thought I had to "upcycle" (I hate that word) the fuselage crate. After about an hour with the chop saw and a drill, I had this very ugly and crudely built shelving unit, complete with staples still sticking out the back of the wood:

World's crudest shelving unit

It's ugly but it's sturdy [enough] and it works! We took a quick break to grab some dinner and then got back to work starting to inventory all the parts, stocking them into our new shelving unit as we went, and trying to keep some order to all the parts. We got through about 6 pages of the inventory list (7 subkits, I think?) but then we started getting tired and cross-eyed. Time to call it a night! We'll finish inventorying tomorrow hopefully, then get back onto finishing the flaps and the rest of the wing kit!

Current state of affairs with respect to inventorying. Lots more to go!


In addition to all the excitement above, we were able to sneak in just a bit of work on the flaps. We primed all the parts and started riveting the nose ribs and hinge brackets together:

The flap parts ready to start attaching to the spars

Still lots more riveting to do on the flaps, but it's coming along! Hopefully we'll be able to get them finished over this upcoming long weekend... we'll see!


Monday, May 18, 2015

Flaps

Flaps are coming along nicely! After work today we got right to work on D&D (deburring and dimpling). Turns out deburring all the ribs, spacers, and skins was about a 3 hour task, even with the EZ-Burrs. It seemed to go by fairly quickly though, and then I dimpled the four top and bottom skins using my trusty ol' MikeyJ-2000. Brought a heap of ribs (42 in total) into the living room with the hand squeezer and got to work dimpling while we watched a short marathon of Criminal Minds on Netflix. Before I knew it, I had a full "done" pile and an empty "to-do" pile... amazing how quick it goes when you're relaxed watching TV! So, in a burst of motivation I went back into the garage to fetch the spars and decided to dimple them on the couch too. Since they are around 8 feet long, it made for some interesting and awkward positioning on the couch. I think Sarah almost got cracked in the head at least twice with a swinging spar. She was a good sport about it though :-)

Anyway, no pics from tonight, but we now have a pile of parts to build both flaps that are basically ready for primer. We'll see if maybe I can sneak that task in over lunch tomorrow and be ready for assembly tomorrow night!

Sunday, May 17, 2015

Flaps

Lots of good progress on the flaps today! Assembled both L and R flap assemblies, and finished all match/final drilling tasks. In order to keep the assemblies straight, I decided to go ahead and bolt them to the wings, and use the row of clecoes along the top of the spar to rest against the top wing skin. This row will be what makes the flaps "appear" straight, because the rivet line in this location will be right along the straight edge of the wing top skin... so what better way to ensure straightness than to put everything against the line to which it will be judged? This also helped during Page 22-5 step 3, where we had to match-drill between each pair of hinge brackets. The plans call out to use some washers as spacers to get the distance right, whereas in our case the brackets were actually bolted to the wings themselves and in the exact orientation they will be after final assembly.

Anyway, not a whole ton of pics today other than the flap assemblies after they came back off the wings after the drilling session:

L flap - outboard side

L flap - inboard side

R flap - outboard side

R flap - inboard side

After these photos were taken, we tore down the flaps back to their individual pieces for the always-anticipated task of deburring, dimpling, scuffing and priming. We were going to continue, but since it was so nice out we instead opted to have some friends over for an impromptu grill-out. Summer is coming! (and so is the fuselage kit...)

Saturday, May 16, 2015

Flaps

Not a ton of progress today, this morning we had a Young Eagles event at the Marion Airport which I was scheduled to fly at (my first time doing so), but the weather had other plans for us with a low ceiling that lingered longer than was forecast. Postponed to 5/30 now. Then we were off to two back-to-back graduation parties, so by the time we were home we weren't exactly at 100% energy levels to get to building.

Still, it was actually a perfect opportunity to sit down in a chair and whittle away at the 22 flap ribs that needed to have their aft-most upper tabs removed. I did all 11 of the L ribs using aviation snips, but the R ribs needed a good set of left-handed snips, apparently my cheapo Harbor Freight set wasn't up for the task. I ended up getting creative with the dremel tool to cut them off, and then finished all 22 of them with the dremel and a sanding drum to clean up all the edges.

The aft end of a L and R flap rib with the tabs removed. This allows access to the lower tab for dimpling.

Sometimes you have to wonder, why didn't they just make the part this way at the factory and save me an hour or two of uber-boring and tedious work? It's all part of the experience, I suppose, and we'll all come out stronger in the end because of it :-)

Once the ribs were done, they could be clecoed on to the spars and be ready to accept the skins. I started on this but decided tomorrow would be a better time to finish the job. Nothing planned tomorrow except building, so should be a pretty productive day!

Friday, May 15, 2015

Flaps

Spent only maybe an hour tonight in the shop, Started with the "optional" next step which was to make lightening holes in the F-1008 spacers. I marked the three locations on just one of the four pieces and drilled a #40 pilot hole in each spot. Then I match-drilled those pilot holes to the other three spacers, and enlarged them all using a unibit on the drill press. The resulting parts look like this:

The FL-1008 spacers with lightening holes

Next we assembled the L/R center hinge subassemblies, which each contain 6 parts all sandwiched together (including the two spacers from above). Had to dig up some "Long" clecoes to be able to reach all the way through the assembly. This was the first time we used this style of clamp during the entire build so far, which was kind of cool.

Once the center hinge assemblies were together, I was able to cleco all the nose rib assemblies (1 rod end assembly, 3 hinge bracket assemblies, and 2 bare nose ribs) to the flap spar, and set the whole thing aside. I actually found that they sat nicely into their eventual homes, against the wing rear spar, so that's where they will rest tonight. Tomorrow, if there's time we'll start on the 22 ribs that need to be cut and filed!

Thursday, May 14, 2015

Flaps

Yesterday we took a short trip with some friends and two other planes to fly formation to KPDC for some delicious steak at Jones Black Angus across the street from the airport. It's a beautiful, scenic part of WI at the Mississippi and Wisconsin River delta, so we both highly recommend it as an excellent meal stop if you're ever in that area! We upped the ante a little bit this time too, and walked a half mile or so further north up the road to Quality Beverage to stock up on Spotted Cow. For those who've been to Airventure at Oshkosh, you may know of Spotted Cow as a delicious local beer that is not available outside the state of WI. We couldn't pass up the opportunity to get ahold of some!

Spotted Cow bootleggers Mike, Sarah, Alec, and Erica. Our friends Jonathan and Gretchen opted to stand on the other side of the camera :-)

Formation flight into the sunset, heading back to Iowa with the goods onboard. Unlikely pairing of two Piper Warriors and a Citabria!

All I will say about trips like these: This is the reason why we love to fly! We cannot WAIT to do many more trips like this in the -10 when it's done...

Anyway, tonight in the airplane factory it was time to get back to work. We cleaned up the garage a bit and got to work laying out all the parts for the flaps. Although the design is slightly different, they still appear to be quite similar to the ailerons, perhaps even a bit more straightforward. For tonight, once we got all the parts laid out, we completed the first few steps which involved marking and drilling a few #40 holes into the flap hinge brackets as well as final-drilling the inboard and outboard nose ribs with their doubler plates. It was simple and fun work that took us through page 22-3 step 2.

The L flap hinge brackets and nose ribs starting to come together

The R flap hinge brackets and nose ribs starting to come together

Our flap workstation, complete with Spotted Cow on the table ;-)

Getting to this part made for a natural stopping point and easy evening of building. This weekend, other than a few minor plans we will be hard at work on the flaps! Fuselage kit is scheduled to arrive on Wednesday next week, let's see how close we get!


Monday, May 11, 2015

Ailerons

Finished the ailerons tonight! Well, except for prosealing and riveting the trailing edges, which I think we'll probably do as a batch job with the flaps and the R fuel tank. Oh yeah, the R fuel tank. Guess what I just discovered we did while I was standing here admiring our work on the tanks?

One of these things is not like the other one

While assembling the baffle for the R tank, I laid out all the attach zees in the correct order and orientation to start from the *outboard* side and not the *inboard* side. So the result? They are all backwards (the L tank pictured on the left above is correct). Grrrrrrr. That was an embarrassingly dumb mistake, and I get to take full credit for it. While we were originally putting these together, Sarah had relinquished her responsibility for the orientation of these parts because she didn't want to mess them up, and trusted in me to get it right. That will teach her...

I guess it's not the biggest deal in the world, things could be way worse. Looking through the forums I found more than one case of a builder doing the exact same thing. It's just going to be a time consuming, frustrating, and tedious ordeal to drill out all of the Zee rivets (12 solid rivets along the exterior flanges and 30 blind rivets for the interior), fish out all 30 of the blind rivet ends, regroup, and re-rivet them into place in the correct order. The hardest part is going to be to ensure we recover all 30 rivet ends. I think this is doable as long as we first wait for the proseal to cure, and take our time getting each piece to come out through the fuel fill opening.

Anyway, that was basically the only real excitement tonight, if you can call it that. Otherwise the ailerons are basically done, and we're ready to begin work on the flaps! We've got a number of plans, mostly related to flying over the next couple of days, so we may not get much more work in until the weekend. Oh yeah, and the fuselage kit should arrive at some point this week!

Sunday, May 10, 2015

Ailerons

The past few days have been filled with an array of other plans including hanging out with some friends we hadn't seen in a while, and then going to the Quad Cities airshow on Saturday, where we both somehow got burnt to a crisp under an overcast sky. Saw the Blue Angels for the first time ever, which was really exciting... what a show! That, along with walking the flight line and talking to everyone from the V-22 flight crew to a guy who restored his own DC-3, put us both in the mood for building!

Happy Mother's Day! Made a lot of great progress on the ailerons today. Final-assembled the counterweight and nose rib assembly, and placed them into the leading edge skin for more drilling, this time to make holes in the counterweight for the leading edge itself.


The right outboard nose rib, with counterweight attached

A close-up of the right inboard nose rib, with counterweight attached

The assembly is placed into the leading edge skin so the counterweight can be drilled to make holes for the leading edge blind rivets

After the leading edge assemblies were complete, we deburred, dimpled, and primed the four aileron skins, and then back-riveted the 32 stiffeners to them.

The four aileron skins with 8 stiffeners and 2 end brackets each

Back-riveting a flat and relatively small piece such as an aileron skin is quite easy and stress-free, compared to a lot of the messy work we're used to getting into with the tanks! It was a very welcome change. Anyway once the skins were completed, it was time to assemble the whole thing for drilling the spar and trailing edge. This is very similar to the construction of the elevators and rudder (essentially the exact same process), so I laid out some scrap pieces of wood (for drilling into), ensured everything was straight, square and level, and put the skins and trailing edges together. After a bit of drilling, we ended up with this:

Starting to look like an aileron!

After final-drilling the trailing edge, the assembly came back apart for more deburring, dimpling, and priming. The plans call to dimple the spar, which seemed odd to me (it's 0.040" thick) but we went with it anyway. It's quite a workout on the hands using the squeezer on material that thick, but we got through it all. Next, the leading edge had to be dimpled. Most of the holes could be gotten with the squeezer, but the few that couldn't be reached are a bit tricky to reach. Thankfully, the MikeyJ-2000 dimpler didn't disappoint!

Not a very good shot, I couldn't hold the part straight and hold the camera

Anyway, with the skins dimpled (and primed), it was time to begin final assembly. We cut out and screwed together 6 cradles per the plans to hold the leading edges of the ailerons (and flaps later) during assembly and got to work. First part was to assemble the leading edge. We placed the leading edges into the cradles and clecoed the ribs and counterweight assembly together like this:

Right inboard side of aileron leading edge

Right outboard side of aileron leading edge

It's a pretty tight space in there, especially if you have big hands like me, but it is doable. Without question, the tungsten bucking bar is critical here. Honestly I'm not sure how you'd do it without one. From here through the rest of the day, I just focused on the right aileron. I riveted the nose ribs and counterweight assembly to the skins, and realized I was running low on LP4-3 rivets. I think possibly because I used them when installing the wing leading edges in places where Van's gave you a choice between blind or solid rivets, I'm going to be about 15-20 rivets short I think. I'll have to place an order for some more first thing Monday.

Anyway, after riveting the aileron leading edge together, the spar and top skin could be installed. We clecoed it into place and started riveting it together, from the middle out towards each side. There was plenty of room to work with because the bottom skin still hadn't been installed, so that was going to be the hard part.

The completed R aileron top skin, from the inside

Close-up view of the inside of the R aileron with top skin installed

In order to orient the bucking bar properly, a "bump" had to be created out of some rolled-up duct tape so that it would sit level with the spar flanges.

Now comes the hard part: installing the bottom skins. There isn't a whole lot of room between the skins, and somehow you've gotta get your hand down in there to hold the bucking bar in place to set all the rivets along the spar. I slid the bottom skin into place, and got to work.

There is just enough room to get your hand in there and enough fingertips on the bucking bar to hold it straight while riveting. This photo was taken directly in-line with the bottom skin (you bascially can't see it) and you can see one AN426AD3-3.5 rivet put into the hole, ready to be set.

Got about halfway through the line of rivets... it's slow going but actually isn't all that bad. We shouldn't have any trouble finishing this up tomorrow and hopefully getting most of the way through the left aileron too... then, on to the flaps!!

The race against the ABF truck carrying our fuselage crate continues... who will win??!? :-)