Mike and Sarah at the wrong wedding... Thanks to the groomsman who took this photo!
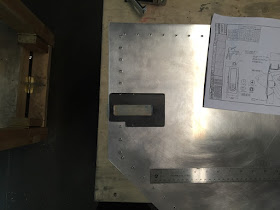
Cutout is 1" x 3-3/8", starting 1/2" forward of the aft edge of the door and vertically centered on the existing hole punched for the key lock. The cutout will go through two rivet holes in the door leaving two small notches in the cutout, but they will be covered by the latch when it's installed.
A 1/8" thick steel plate 3" x 5" was fabricated to strengthen this area of the door. The cutout at the bottom is made to clear the baggage door frame.
The latch installed into the hole and screwed into place
The baggage door with latch installed
The inside baggage door cover with modified cutout, measuring 3-1/4" x 1-1/2". A new #30 hole was drilled to mate with the frame, which must be cut to allow clearance for the latch.
The door riveted together and installed in the plane
The latch holding on to the F-1031 Upper Baggage Door Seal (the bolt is temporarily wrapped in electrical tape until I get a rubber stopper for it)
Closeup of the latch and frame cutout
The open baggage door, inside cover isn't riveted on yet
A video of the door in operation
It works great!! I still need to figure out two more things with the door before it's done: (1) The frame needs stiffening in the area where I cut it so that it won't have a tendency to bow. It's not bad as-is but I want it to be a little better. I should be able to rivet a piece of 0.032" aluminum between the two halves and that should easily take care of it though. (2) Before riveting on the inside cover, I want to source and install a small strut to facilitate the opening and closing of the door, as well as limit its travel. In addition, I'll need to finish up the F-1031 channel and install provisions for a microswitch and striker plate. Again, shouldn't be too big of a deal.
That's pretty much it for now! I'll be on travel the rest of this week, so there probably won't be much more progress until this coming weekend... until next time!


